
The non-fungible token (NFT) market grew by leaps and bounds in the last few years. The NFT craze swept everyone off their feet, from independent artists like Beeple to mainstream companies like Nike, VISA, and adidas.
Amidst this new gold rush, anyone can mint an NFT and sell it on NFT marketplaces.
This article will elaborate on the minting process so that anyone can start creating their own NFTs.
What is NFT minting?
Minting refers to the process of immutably storing digital files on a decentralized and distributed ledger, also known as a blockchain. It usually does not involve any complicated procedure.
As Denise Schaefer, co-founder of Surge said, “there’s a big misconception that you have to be technical in order to participate in crypto.” Dispelling the myth, she emphasizes, “I look at NFTs as a fun entryway into the space that doesn’t require coding skills.”
How to mint NFTs
There is no one way to create NFTs since each blockchain has its own process for minting. The Ethereum blockchain is the most famous for NFTs with major NFT projects like Cool Cats, World of Women, and 1989 Sisters. It isn’t surprising that OpenSea, the top marketplace supporting Ethereum blockchain NFTs, recorded a staggering $5 billion in monthly sales in January 2022.
The following section will examine how to mint using OpenSea as an example of an NFT marketplace:
1) Connect your cryptocurrency wallet
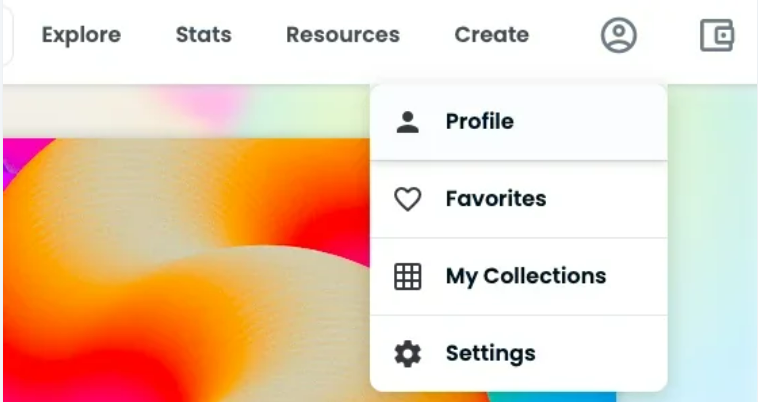
The first thing to do in a marketplace is connect your wallet to make some initial crypto transactions. On the OpenSea website, click ‘Profile’ in the top-right corner, which will take you to a page where you can connect your crypto wallet.
There are multiple options available, including MetaMask, the top wallet for Ethereum and collectible digital assets.
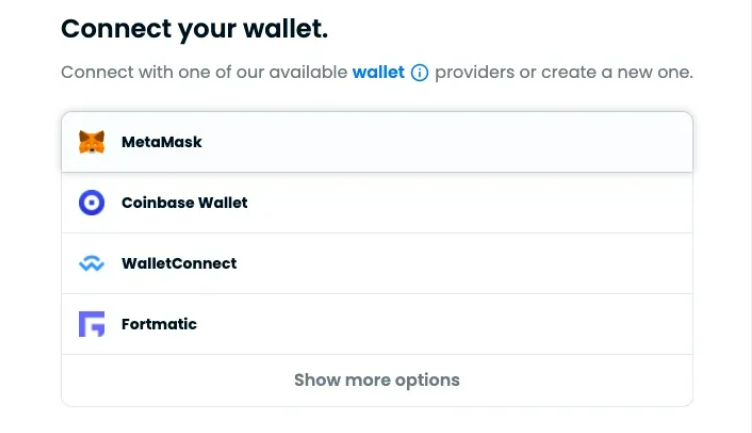
If you have a MetaMask plugin already installed, you’ll simply need to accept the terms and conditions and click ‘Sign’. By ‘signing’, you will authenticate your wallet—don’t worry, the activity will not generate any fees. Once you sign and authenticate, OpenSea will create your profile.
2) Set up your profile
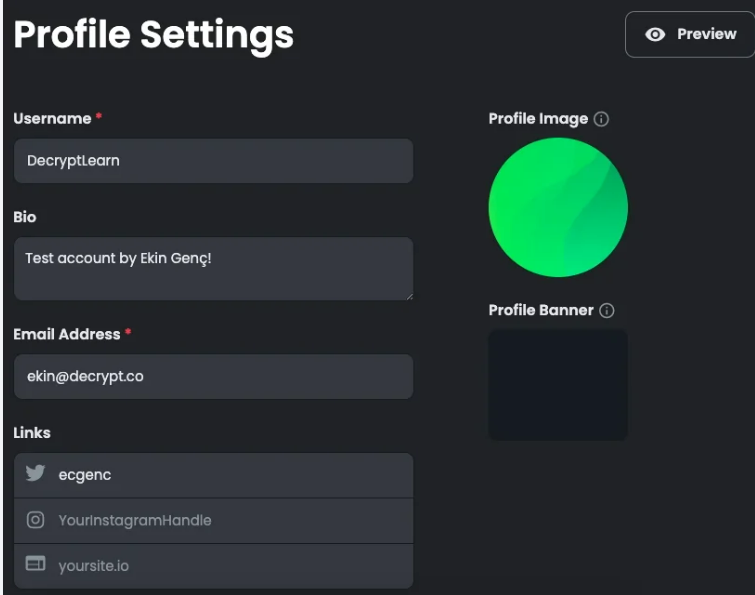
You’ll need to personalize your profile by creating a username and a corresponding email address for account verification. Additionally, you can change your profile picture, put up a profile banner, and add a description of yourself in the Bio. You can also provide links to your social media page or website. Once you verify your account through email, your profile will be ready and you can start creating NFTs.
3) Create your own NFTs
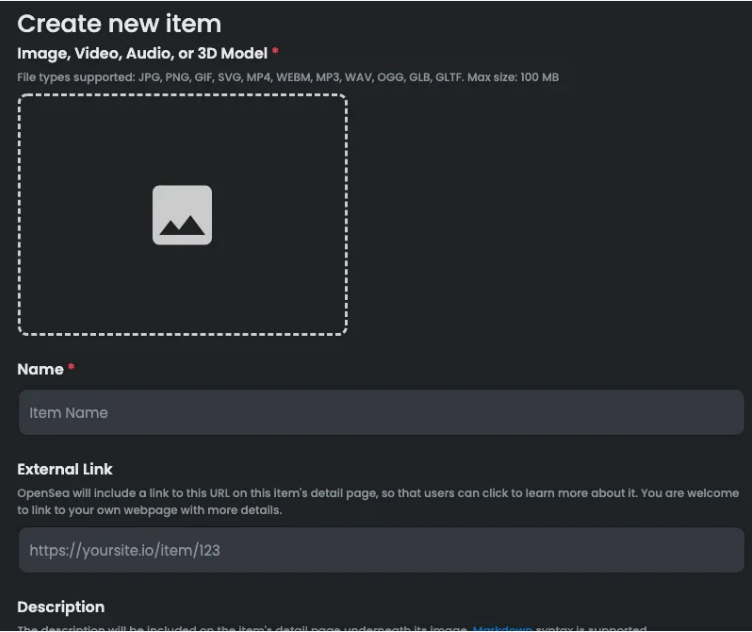
On OpenSea, click the ‘Create’ button (next to your profile picture) on the top right corner of the webpage. This will take you to the page where you can create your first NFT. You’ll need to select and upload a digital file (image, video, audio) from your computer. OpenSea supports JPG, PNG, GIF, SVG, MP3, MP4, and a few other file formats with a maximum size of 100 MB. Give a name to your NFT and provide a brief description along with an external link (the latter two are optional). Moreover, you can set a royalties percentage for each time your NFT sells in the secondary market.
You’ll also need to select the number of copies that OpenSea will mint under the ‘Supply’ section. Finally, choose a blockchain where your NFT will be minted—either Ethereum or Polygon—and click the ‘Create’ button.
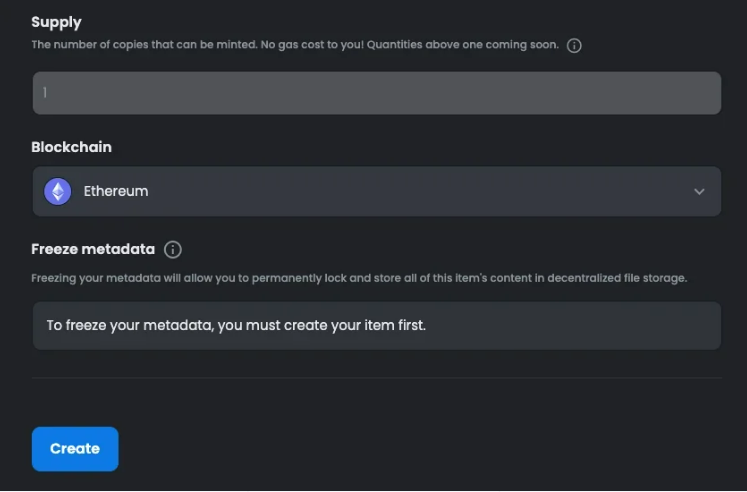
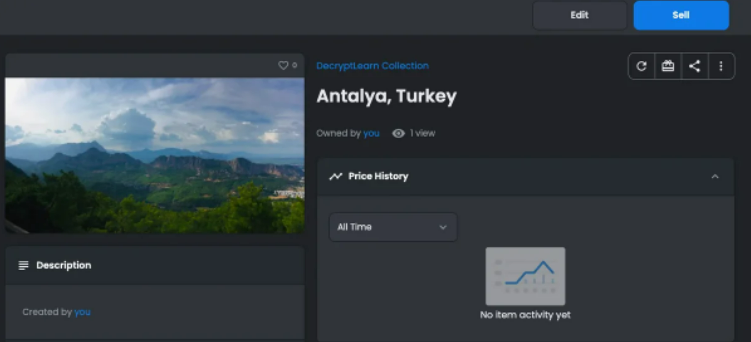
Congratulations! Your NFT will now be minted. However, since you have not listed your NFT on the marketplace, you cannot sell it yet. To initiate an NFT sale, click the ‘Sell’ button in the top right corner.
4) List your first NFT for sale
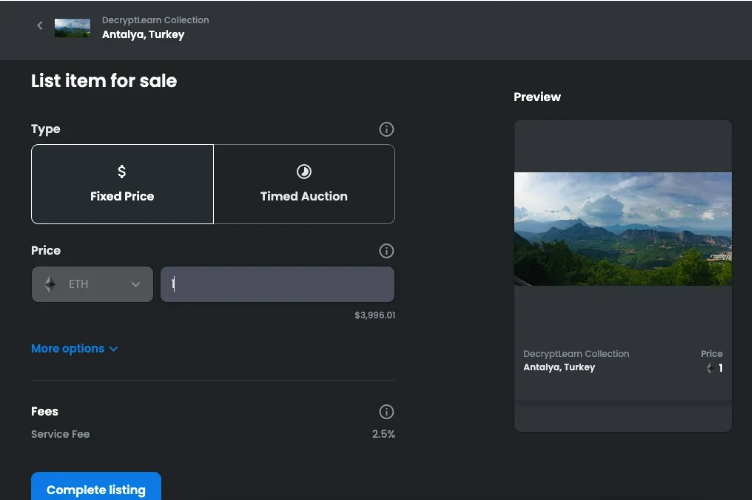
On OpenSea, you will have two options for selling NFTs: either at a fixed price or via auction. Once you set the price, click ‘Complete listing’. Remember that OpenSea charges a 2.5% service fee for each NFT sale.
In order to complete the listing procedure, you’ll need to ‘initialize your wallet’ to pay for one-time gas fees. In other words, to sell your first NFT collection, you need to sign a few transactions through your crypto wallet.
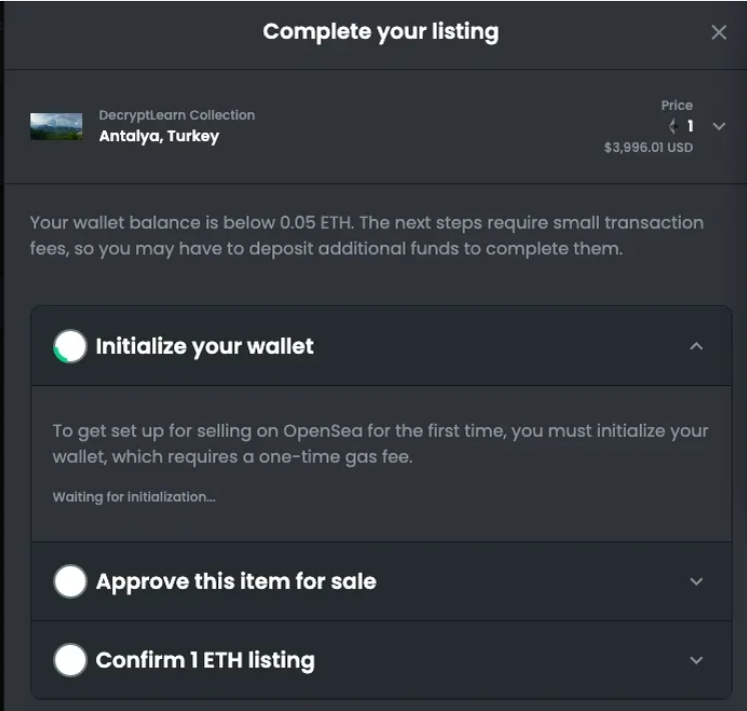
If your wallet does not have sufficient money, you cannot click the ‘Confirm’ button. Once you recharge your wallet with enough funds to pay for the initial gas fee, click ‘Confirm’ to complete the listing.
NFT marketplaces are not the only platforms where you can mint an NFT. There are several strategies to mint NFTs and the following section will lay out the details.
Minting NFTs using a smart contract address
Direct NFT minting from a smart contract can be a risky affair, but may be necessary on certain occasions. Sometimes an NFT project website faces technical issues, and minting NFTs directly from the webpage becomes difficult. During such times, minting from a contract can be a good alternative to bypass the overwhelming website traffic. However, users need to remember that the contract procedure will only work from the project launch until all NFTs have been sold out.
The following section will explain how to mint NFTs from a smart contract on Etherscan:
1) Find the NFT smart contract address
The first thing to do is locate the contract address for a particular NFT collection. You can find it on the project’s official website or social media pages. You can also ask the project developers to provide you with the contract. Alternatively, if the project is already on OpenSea, you can click the ‘Details’ section of an NFT to locate it.

2) Search Etherscan for the smart contract address
Once you have the contract details, copy-paste it onto the search bar of the Etherscan website. When you click the search button, it will open up the homepage of the contract showing transaction details and additional information. Scroll down to click the ‘Contract’ button.

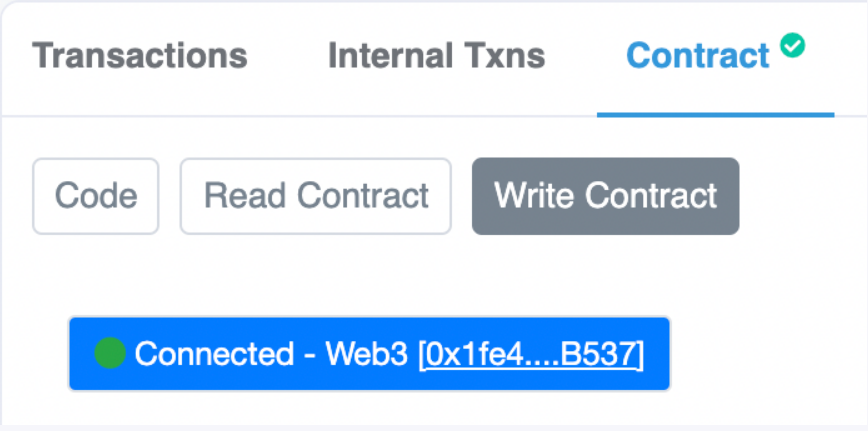
3) Connect your crypto wallet
Once you click ‘Contract’, the webpage will show 3 options: Code, Read Contract, and Write Contract. Click the ‘Write Contract’ button first and then click ‘Connect to Web3’. The latter will help you to connect your wallet where you will hold your NFT. Upon successful connection, it will show ‘connected’ along with a green dot.
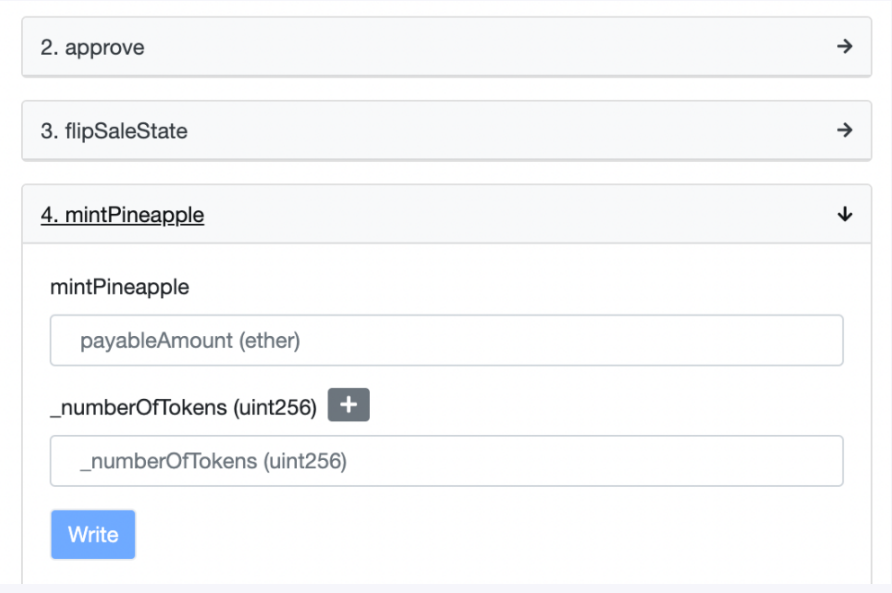
4) Start minting on Etherscan
Scroll down and select the ‘mint’ function from the list (displayed as mint[project name]). For example, if a digital art project is called Pineapple, it will show as mintPineapple. Once you expand the ‘mint’ section, it will show two separate input rows. In the first row, you will need to insert the mint price; in the second you can input the number of tokens you want to mint. Once you add these details, click ‘Write’.
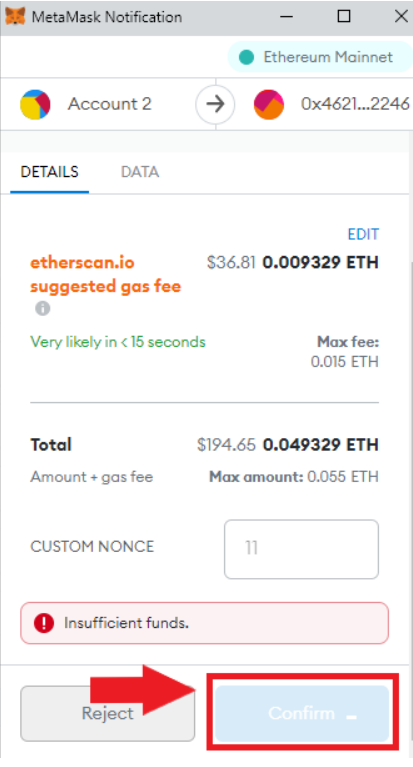
5) Pay the transaction fees
Your MetaMask wallet will pop up after clicking the ‘Write’ button.This is where you’ll need to pay for the cost minting. Make sure you have sufficient funds to cover the gas fees, as well as the mint price. If you have the required cryptocurrency in your account, just click ‘Confirm’ to complete minting your NFT.
Minting NFTs on a non-Ethereum blockchain
Minting a non-fungible token (NFT) on the Ethereum blockchain can sometimes become a price-intensive procedure. During periods of high network congestion, processing a transaction becomes excruciatingly slow, with exorbitant gas fees. Naturally, users have looked for an alternative blockchain to create NFTs.
The following four networks provide a cheaper alternative for creating NFTs and selling them.
Solana
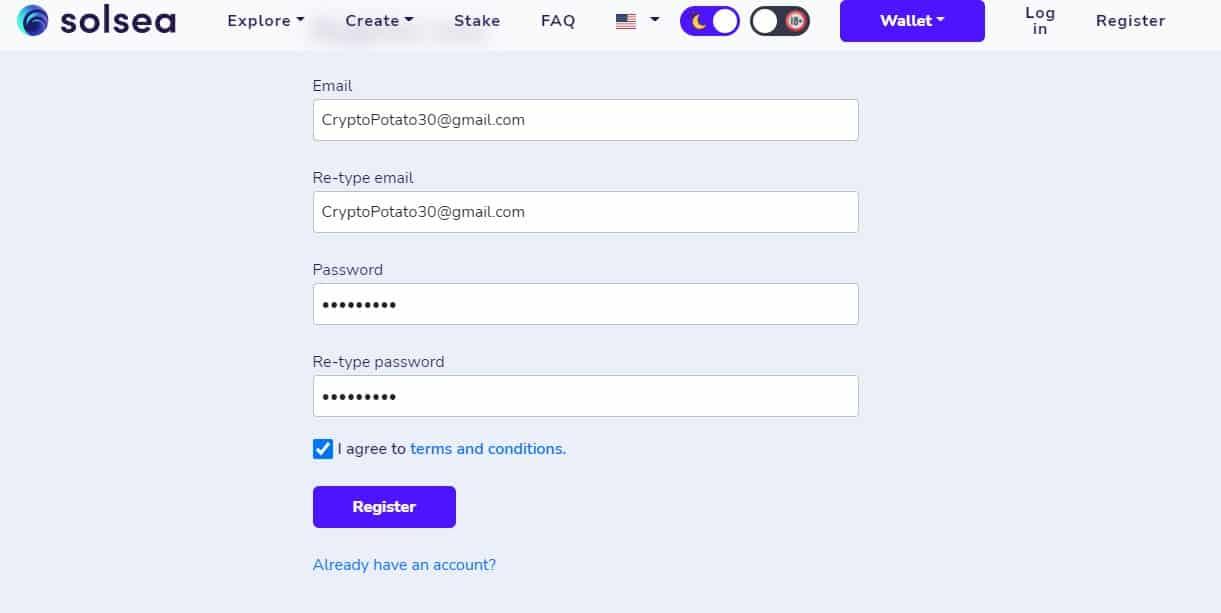
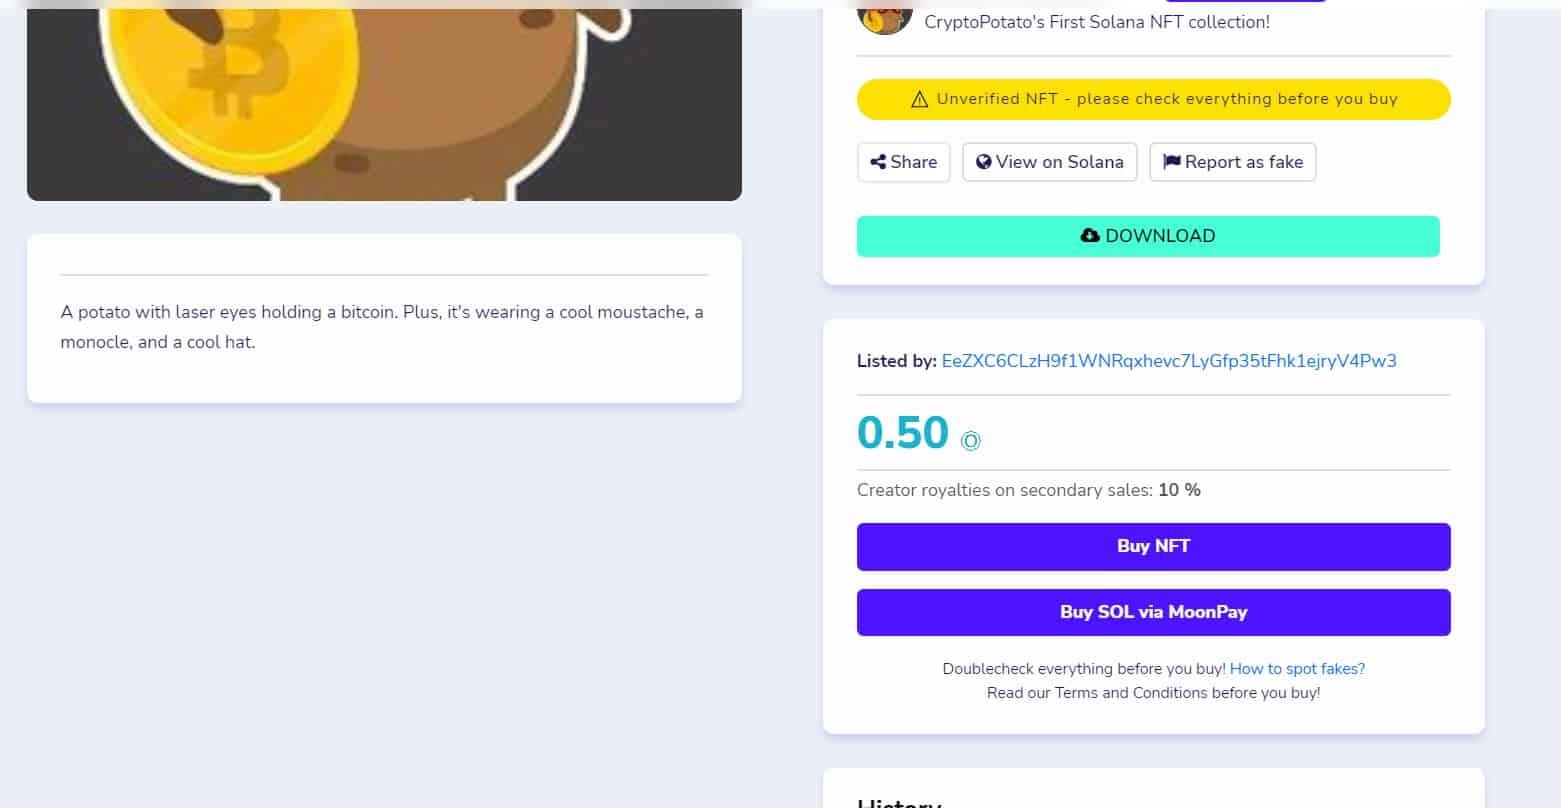
SolSea is a popular platform on the Solana network that will help us understand how to create our own NFT. To create a new account, first, click the ‘Connect Wallet’ button on the top right corner of the website.

Once you connect your Solana wallet (like Phantom), SolSea will redirect you to the sign-in page. Type in your email address and set a password for your SolSea account.
Next, click the ‘Create’ button to upload your digital assets to the platform. SolSea accepts JPEG, PNG, GIF, MOV, MP4, among other file formats (not exceeding 10 MB).
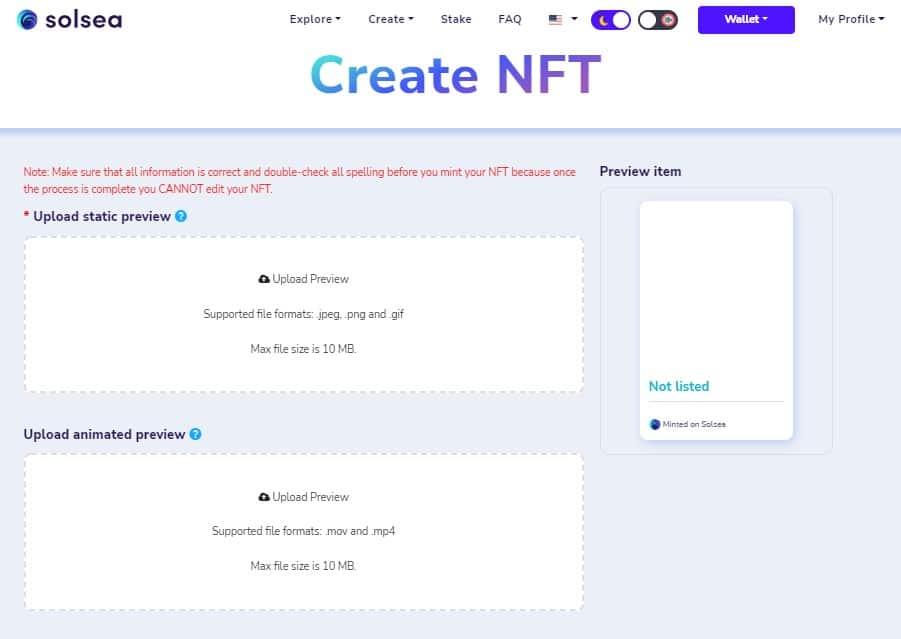
You’ll also need to give a name to your NFT as well as a description for what it is.

In the next step, you can fix your royalty percentage from a secondary purchase and fill in additional details. This includes an ‘External Link’ (to your webpage), ‘Tags’ (audio/video), ‘License’, ‘Traits’, and other such details.
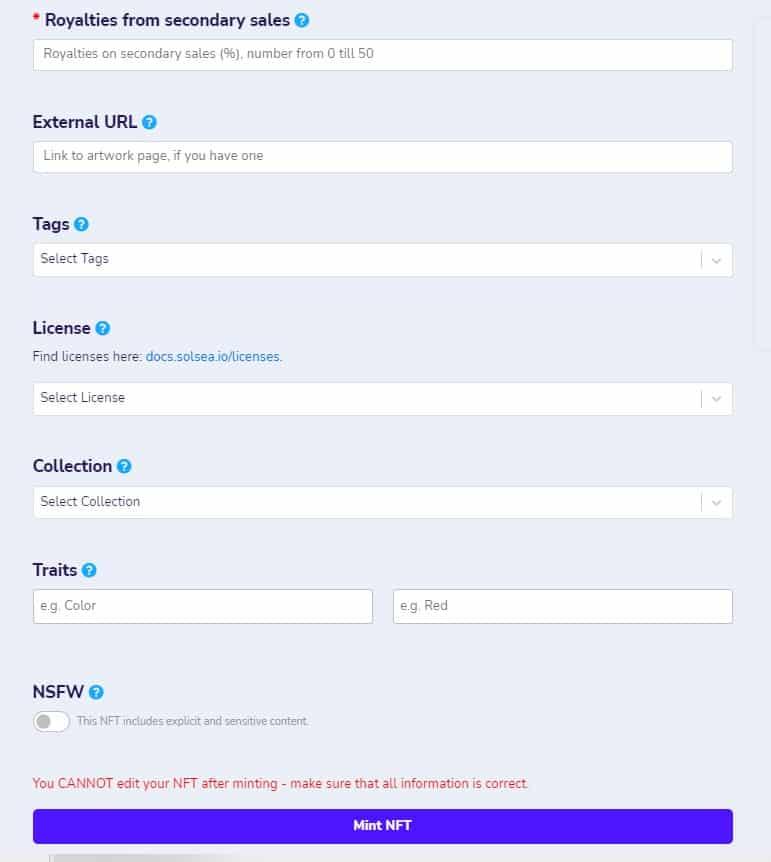
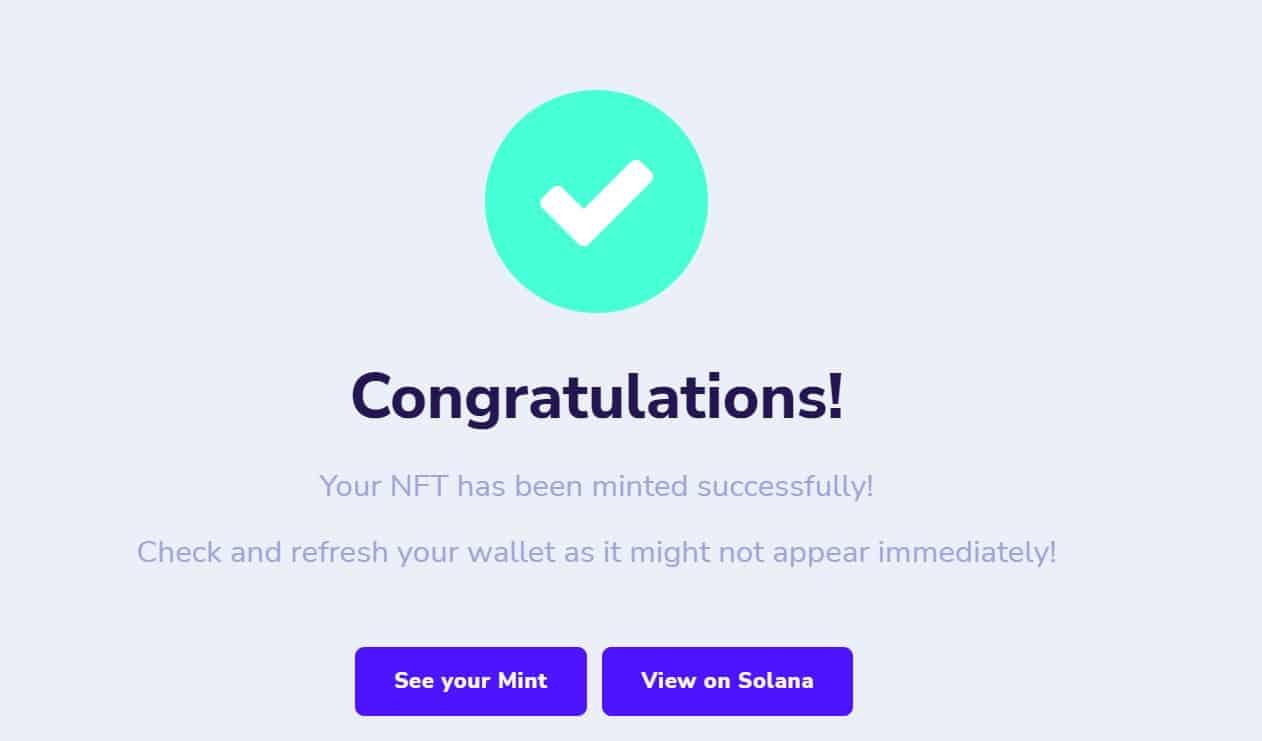
Once you fill in all the relevant fields, click ‘Mint NFT’ and SolSea will successfully mint your NFT.
If you want to make your first sale, then you can list your own NFT to sell on the marketplace. Just go to your wallet and click ‘NFTs In My Wallet’.
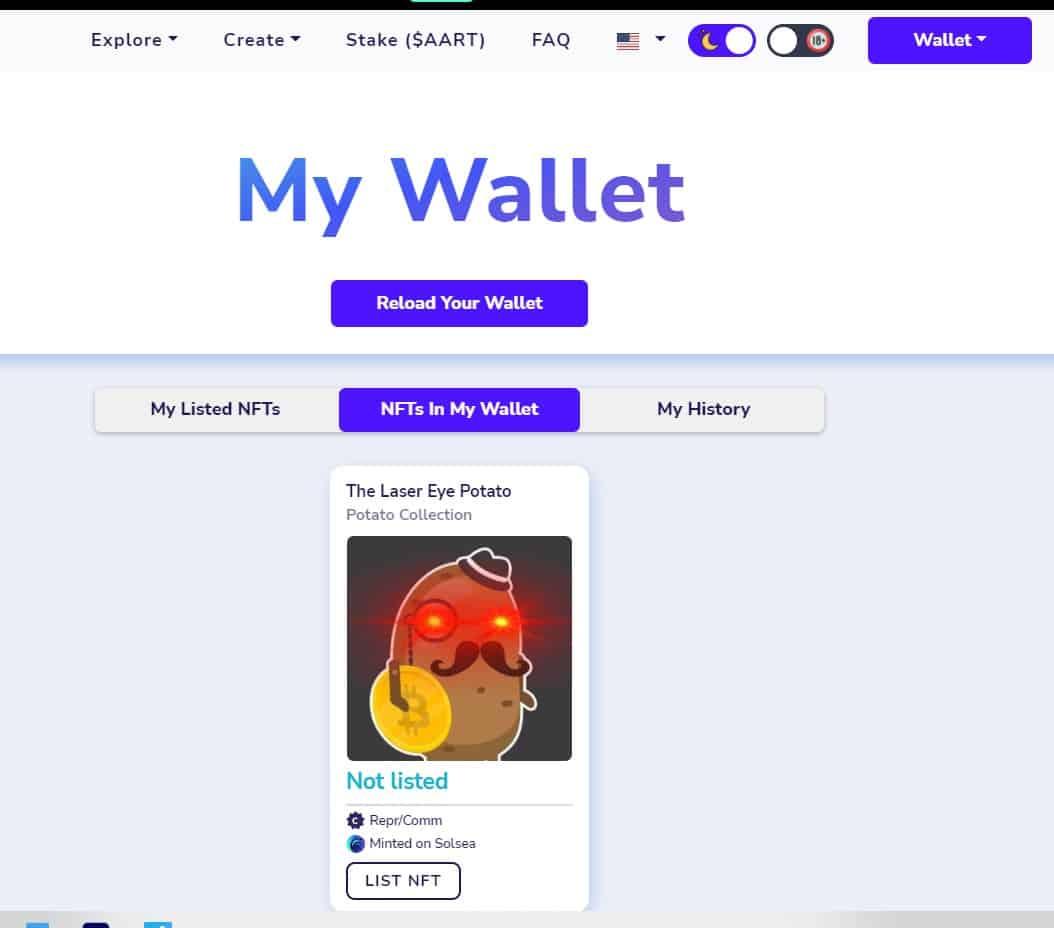
Then, click ‘List NFT’ and set a price for the digital asset.

Once you list your NFT, it will be available for buying and selling on the SolSea platform.
Polygon
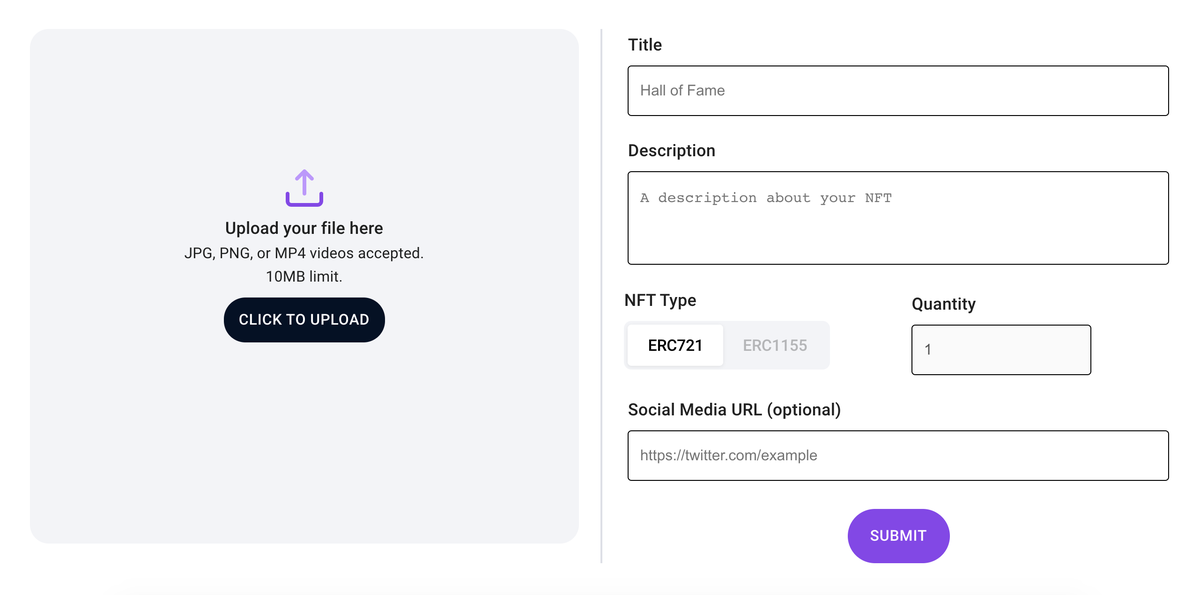
To mint your art as NFT on Polygon (formerly Matic), you can use the NFT Minter application. Once you open the website, connect your Polygon wallet. Then upload your files (JPG, PNG, MP4 format) with a maximum size of 10 MB. Provide a title and description of your NFT, and choose the token type (ERC721/ERC1155) and quantity for minting. You can also provide a link to your social media (optional). Once you click ‘Submit’, the Minter will mint your NFT in just a few minutes.
Cardano
You can mint art pieces on Cardano (ADA) in less than five minutes using the Cardano Token and NFT Builder. First, connect your Cardano wallet (such as Daedalus or Yoroi) to the website where you will receive your NFT. Then select ‘NFT’ and click the ‘Forward’ button.
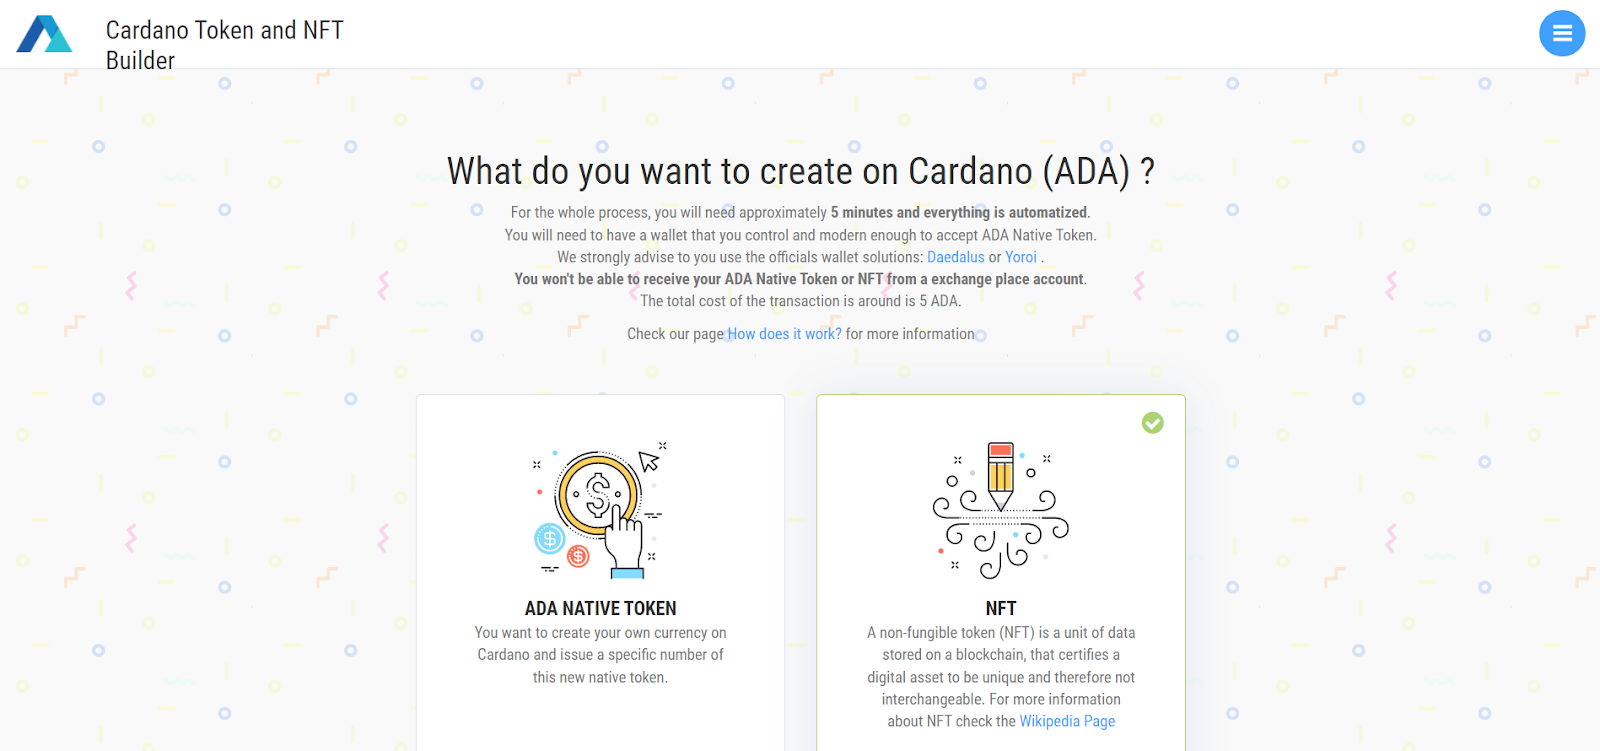
On the next page, give a name to your NFT, and fill in optional details (a brief description, artist’s name, metadata). Then drag and drop a file (image/audio/video) with a maximum size of 15 MB. The website will store your NFT on the IPFS Server. For the uninitiated, InterPlanetary File System (IPFS) is a peer-to-peer network to store and share data through a distributed file system.

Once you fill in the details, deposit the native cryptocurrency (ADA) to mint your NFT. Upon payment completion, you will receive the NFT along with the metadata in the root directory in JSON format.
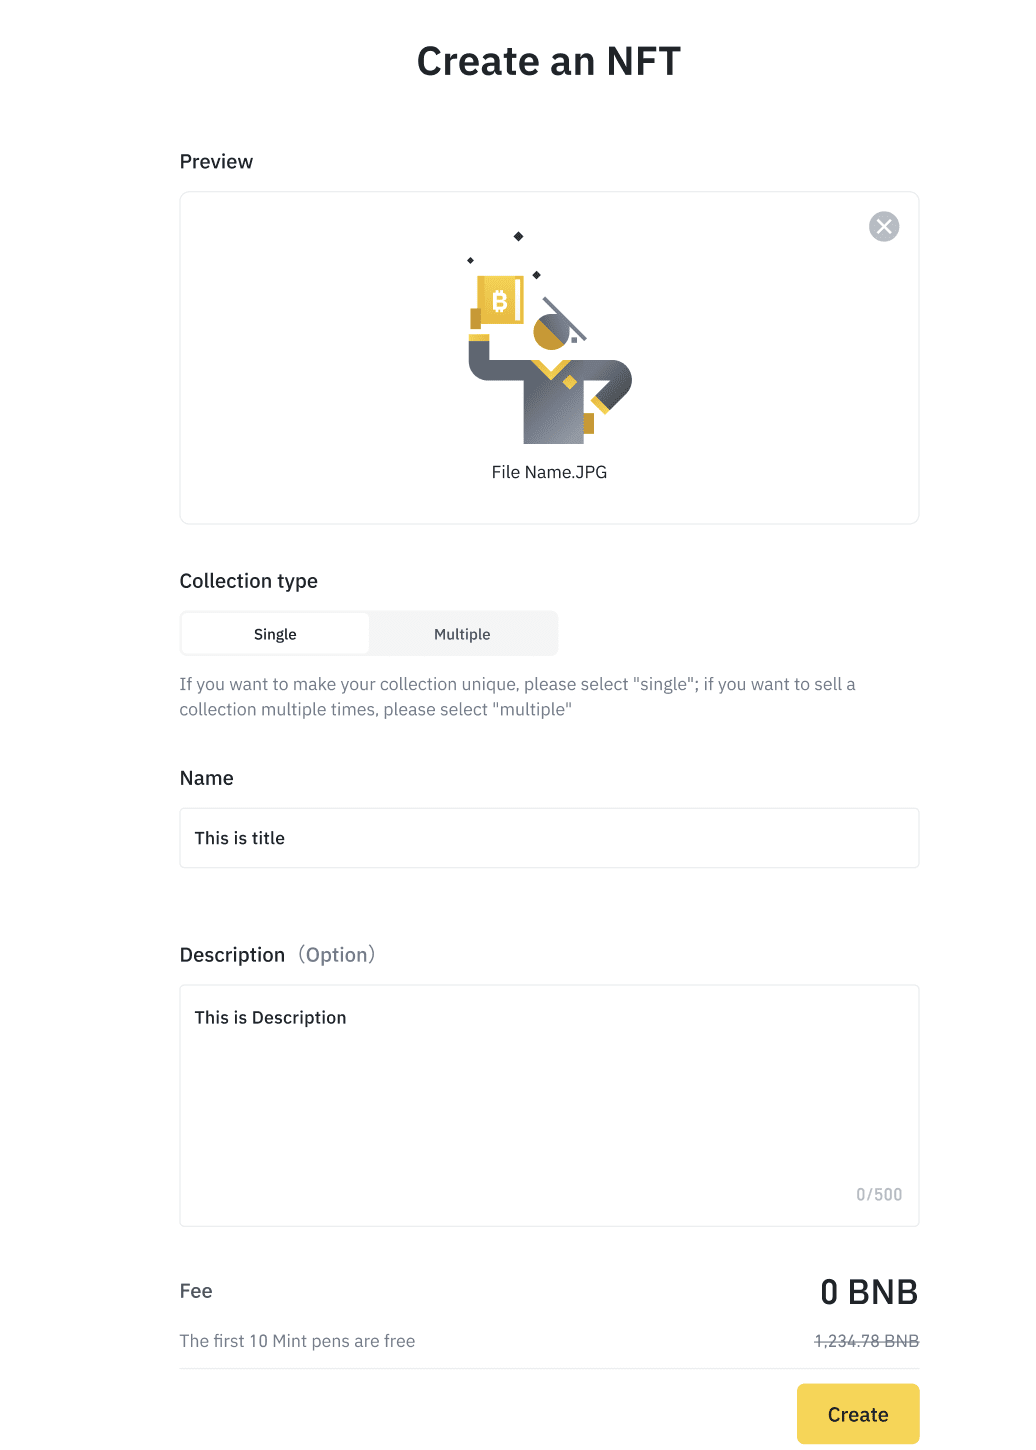
Binance
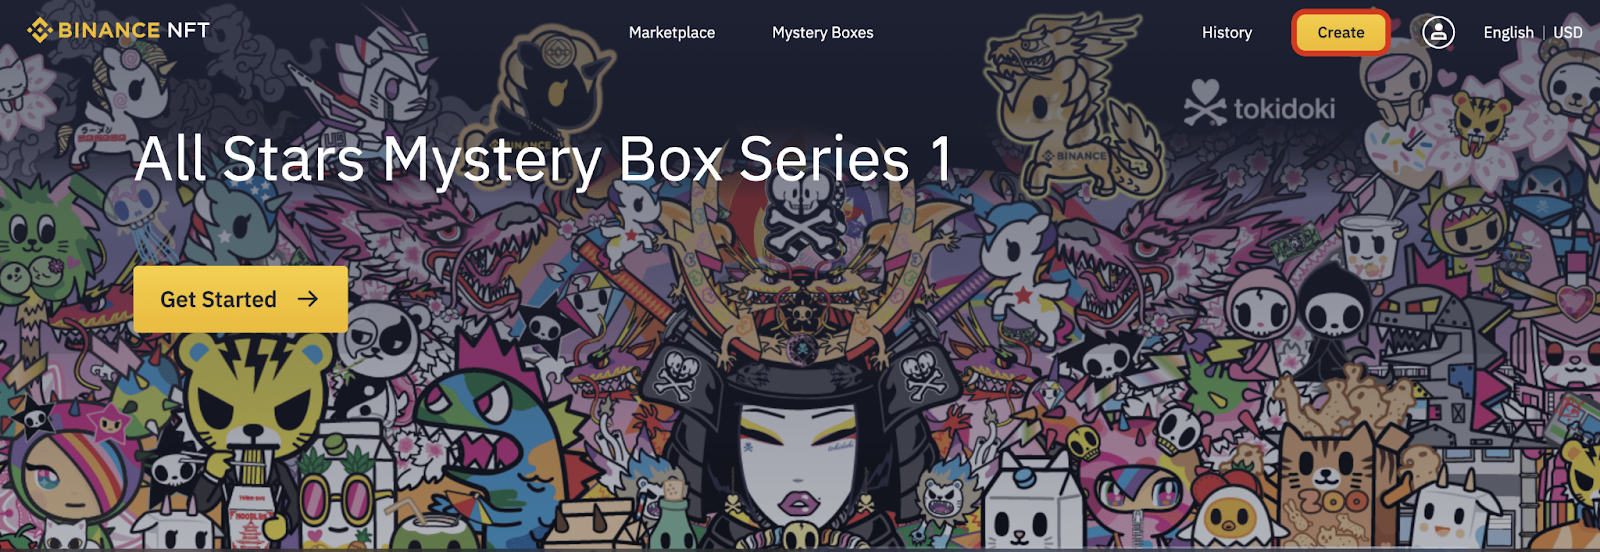
To mint NFTs on Binance, you can use the Binance NFT Marketplace. To do so, click the ‘Create’ button on the homepage.
Next, select an art image (JPEG, PNG, GIF), video (MP4, MPEG, AVI), or audio (WAV, MP3) file not exceeding 50 MB.

On the following page, give a name to the NFT as well as define it with a short description (optional). You can choose whether you want a single NFT (BEP-721) or multiple NFTs (BEP-1155). Then click ‘Create’ to mint your NFT. Binance will store the data in a centralized database. The minting fees vary depending on the network. For example, Binance deducts just 0.000001 BNB from user accounts to mint NFTs.
Post-minting, you can decide to sell your NFT by listing it on the marketplace. A well-made NFT can be sold in minutes.

NFT minting from a Website
There are some websites with built-in features where you can start minting from scratch. The procedure is similar to the aforementioned methods: first, connect your crypto wallet to the website. Then, upload a compatible image/audio/video file, give it a name and description, and mint it. You’ll usually need to pay some fees for the minting process.
However, some websites may be fake and malicious hackers can dupe you. The underlying code may contain bugs that will drain funds from your crypto wallet. To prevent cryptocurrency and NFT scams, it is important to verify certain details before deciding to mint from these websites. Before you input sensitive information, check if the https link is authentic or not. Cross-check them with social media handles to see if the developers are using a similar https address. You can also read this detailed guide to avoid crypto and NFT scams and hacks.


