.png)
Hardware wallets are one of the safest options for storing cryptocurrency securely.
For crypto newbies, setting up hardware wallets can seem like a challenge if the concept is entirely new to them.
But learning how to use hardware wallets is important if you want to practice complete self-custody of funds.
This guide provides step-by-step instructions for setting up your own hardware wallet, using the Trezor Model T as an example.
Why Trezor Model T?
The Trezor Model T is a great option to protect your coins and manage your funds. Complete beginners can enjoy the easy-to-use interface and guided instructions, while more advanced users can choose from exclusive features to customize their experience.
Most hardware wallets have a similar setup flow, so learning how to set up one can help with setting up others.
Setting up your hardware wallet
Step 1: Check for tampering
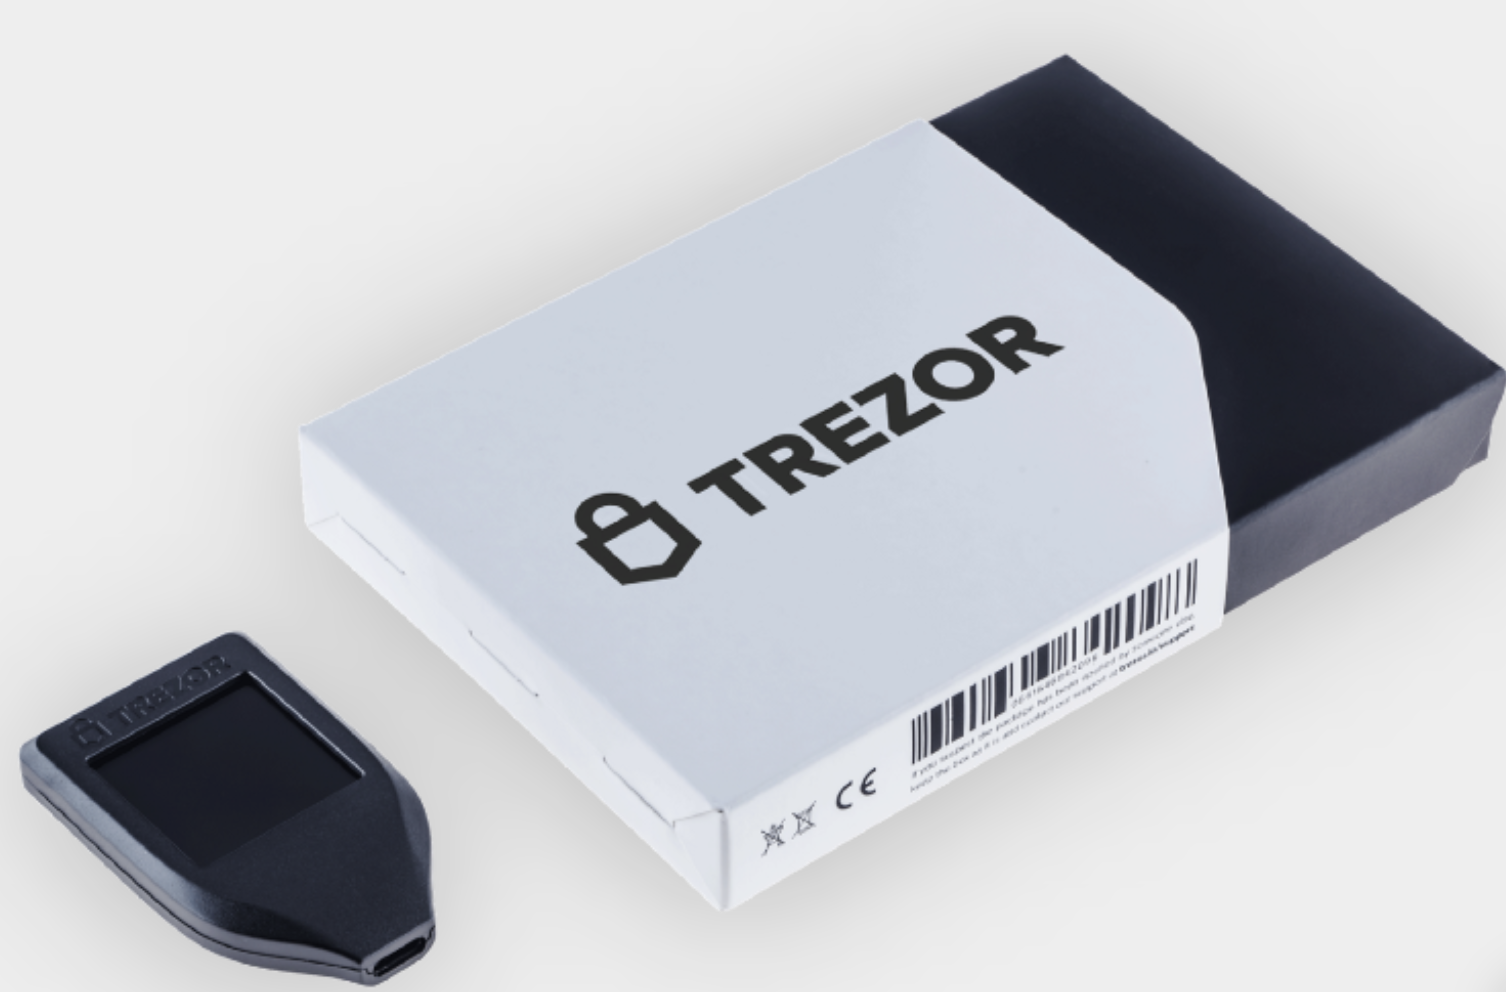
The first thing you should do when you get your Trezor is ensure the packaging is intact and that the holographic seal has not been tampered with.
If there are any signs of tampering, contact customer support to arrange a replacement device.
No signs of tampering? You're ready to connect your device to Trezor Suite (or a similar app used by your wallet’s manufacturer).
Step 2: Download the app
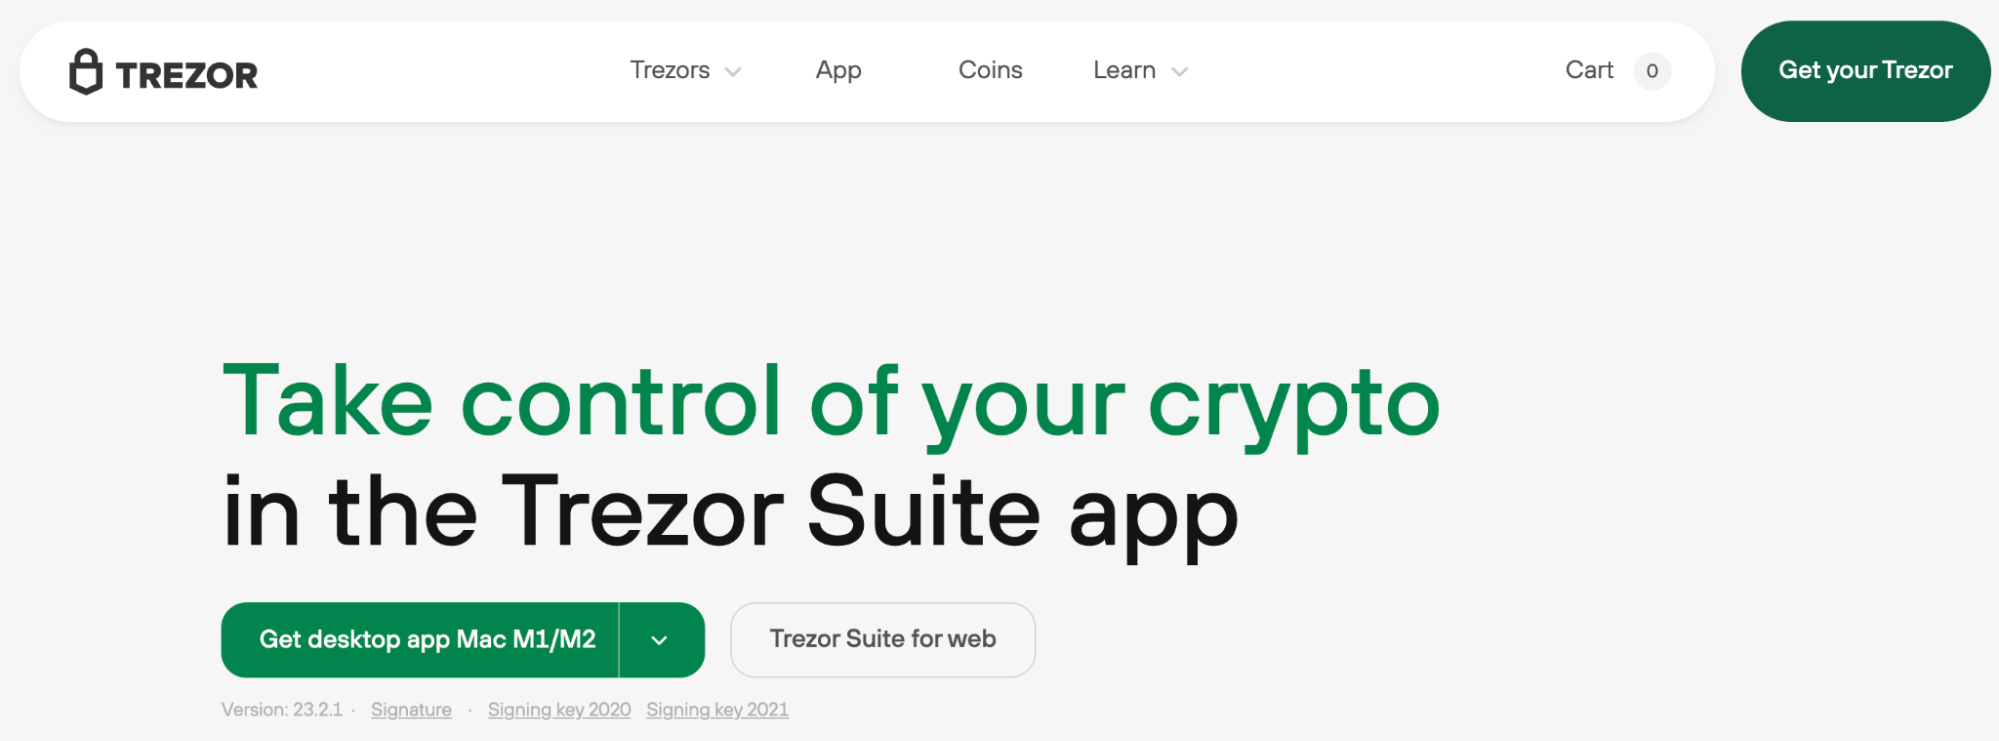
Download the Trezor Suite app, connect your Trezor Model T to your computer, and follow the instructions to install the latest firmware.
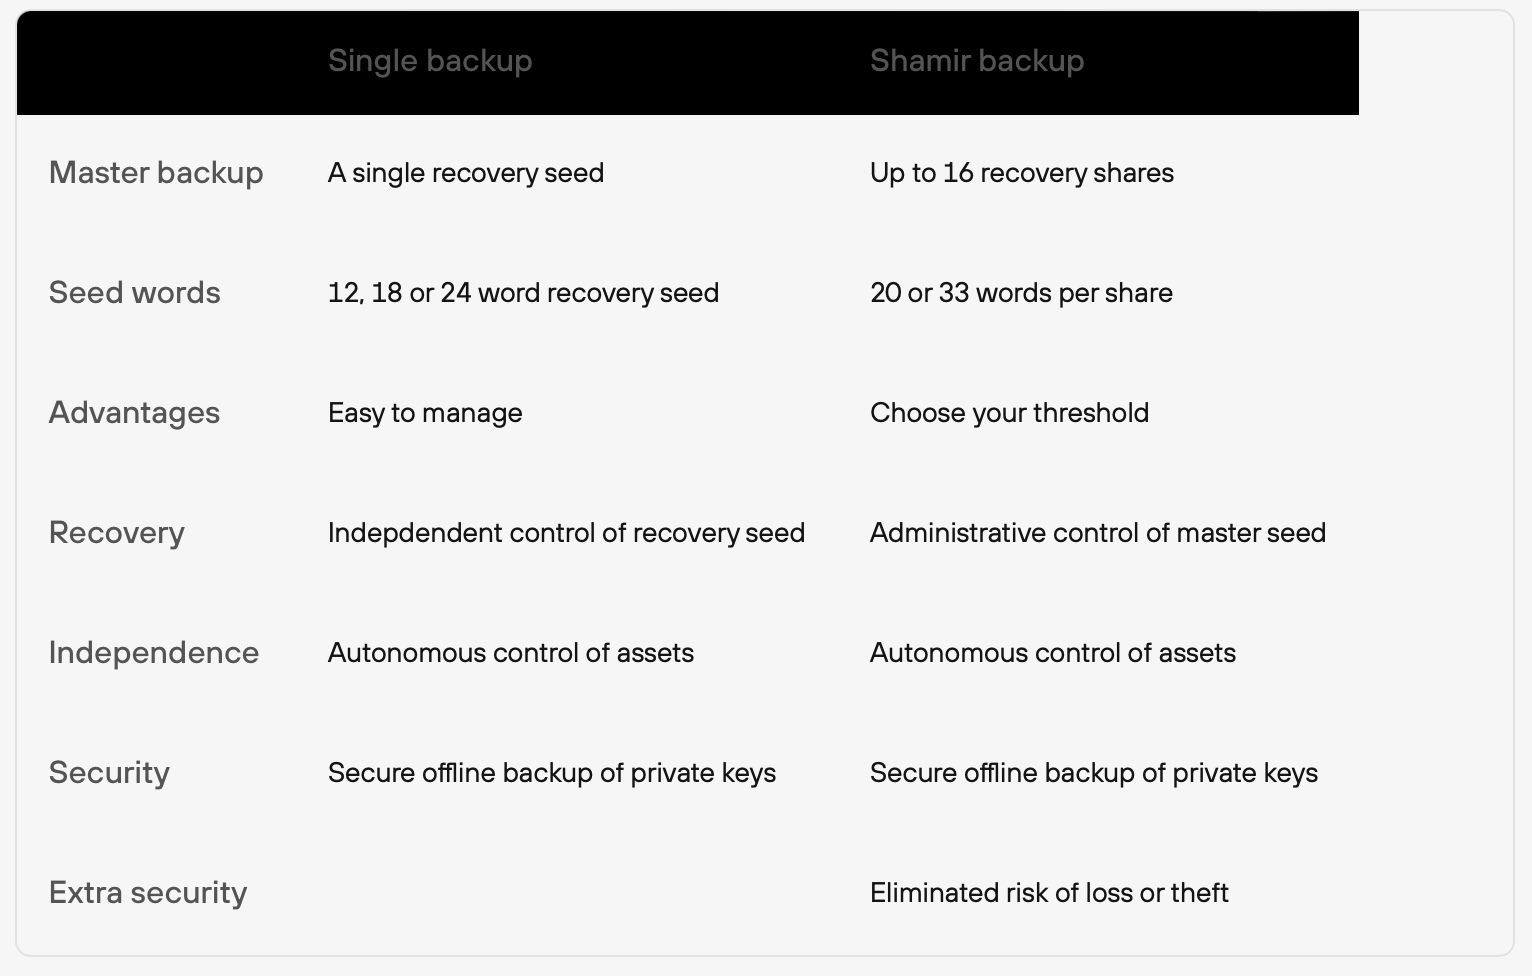
If this is your first wallet, select “Create new wallet,” and you'll be asked to choose between the “Standard seed backup” or “Shamir share backup.”
Shamir share backup is more secure but is also more difficult to set up. For first time users of a hardware wallet, choosing the standard seed backup may be a better option.
Your backup is highly important, as even if your Trezor device gets lost, broken, or stolen, you can still recover your cryptocurrencies as long as you have your seed backup.
Since you generate the recovery seed during setup, you will be the only person who knows it. This is why creating a reliable backup is vital.
Step 3: Backup / store seed phrase
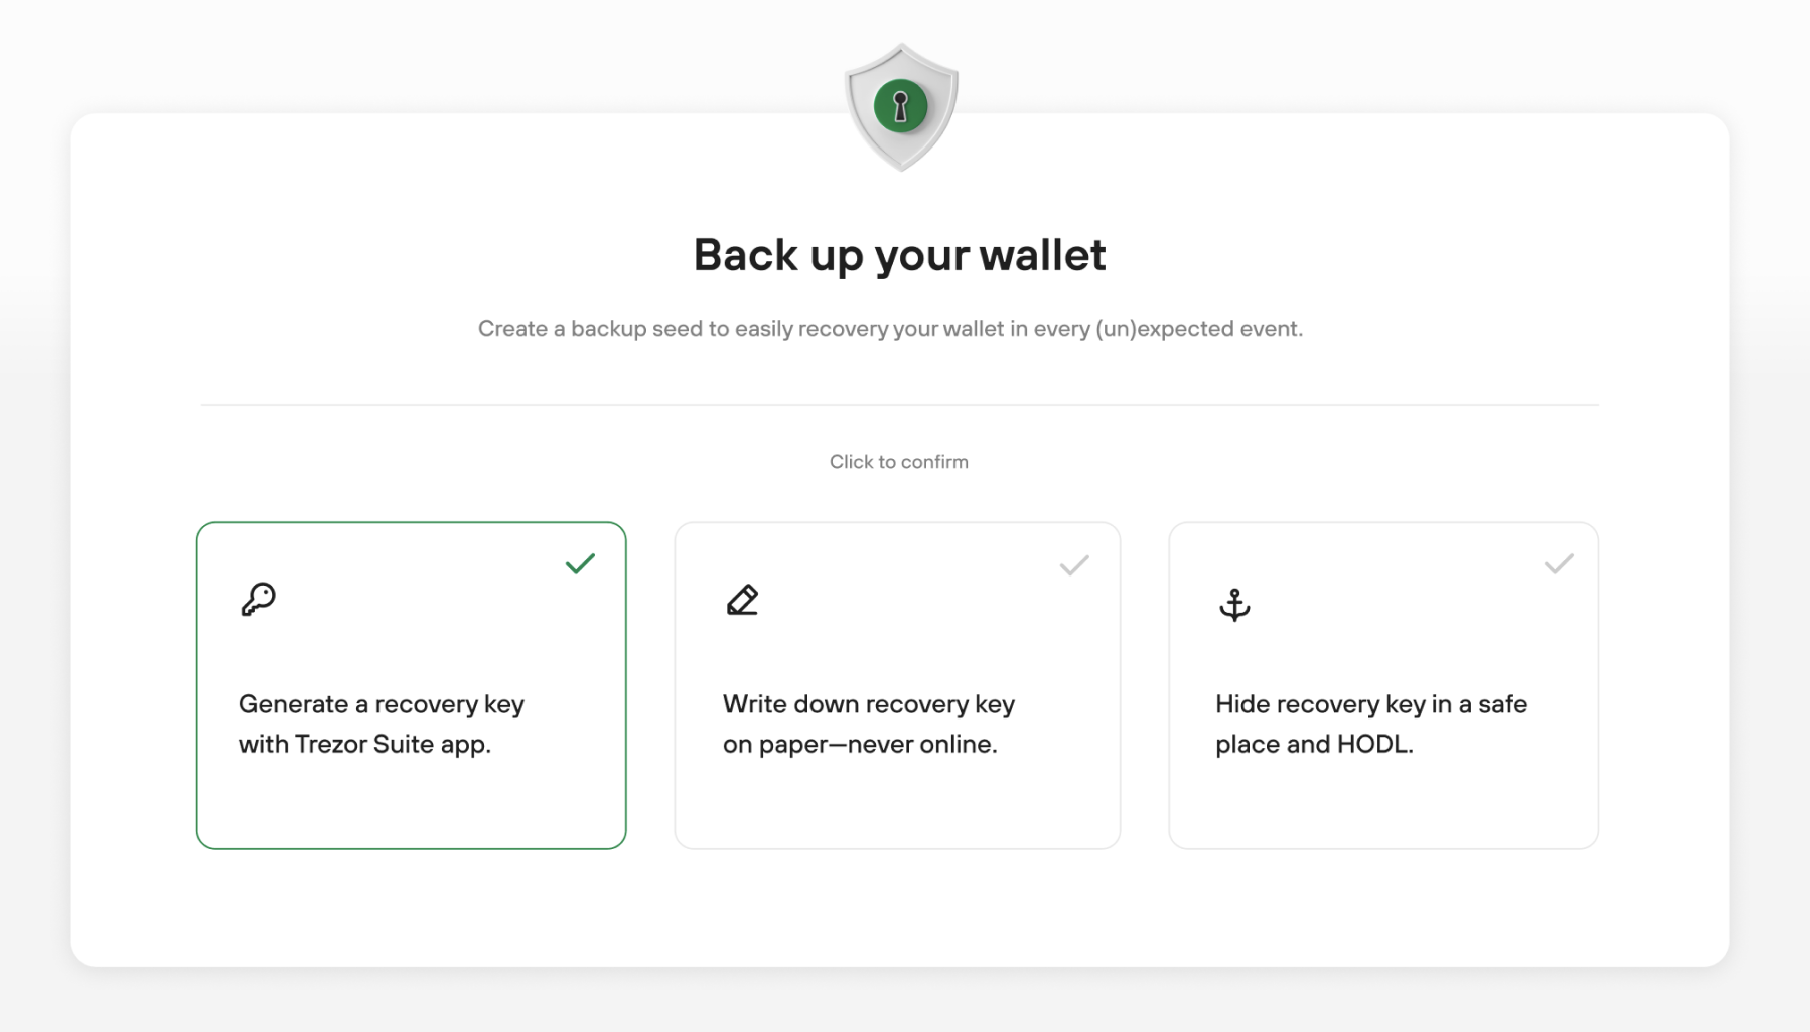
Let's take a deeper look at your backup options.
If you select “Standard seed backup” you'll be prompted to write down your recovery seed phrase (12-24 words) in the correct order on the recovery seed cards provided. This information is the most important part of securing your Trezor and your cryptocurrencies.
Never make a digital copy of your recovery seed phrase and never upload it online. This helps ensure protection from hacks and many other online attacks.
After you've written down your recovery seed phrase, you'll be prompted to verify it by entering the words into your Trezor device.
To learn more about private keys, read our article Public key vs private key
Shamir share backup
If you select “Shamir share backup”, this basically takes your recovery seed phrase and breaks it up into multiple shares that are individually useless but, when combined, can access your wallet.
For example, if you create five shares, you can specify that three out of five of these shares are needed to access your wallet. This allows you to store the five different shares in five different locations, which enhances your protection against theft, damage, etc.
Once you've created your backup, you'll be prompted to double-check it, and you can continue to set up your PIN.
You can also perform a test recovery by visiting “Device settings”, which will allow you to confirm that you wrote down your seed properly.
Now that your recovery seed phrase and PIN have been created, verified, and stored safely offline, it's time to choose which cryptocurrencies are shown when you connect to Trezor Suite.
Follow the prompts, and when you're happy with your selection of active coins, simply select “Complete setup” and you're ready!
Standard wallet vs Hidden wallet
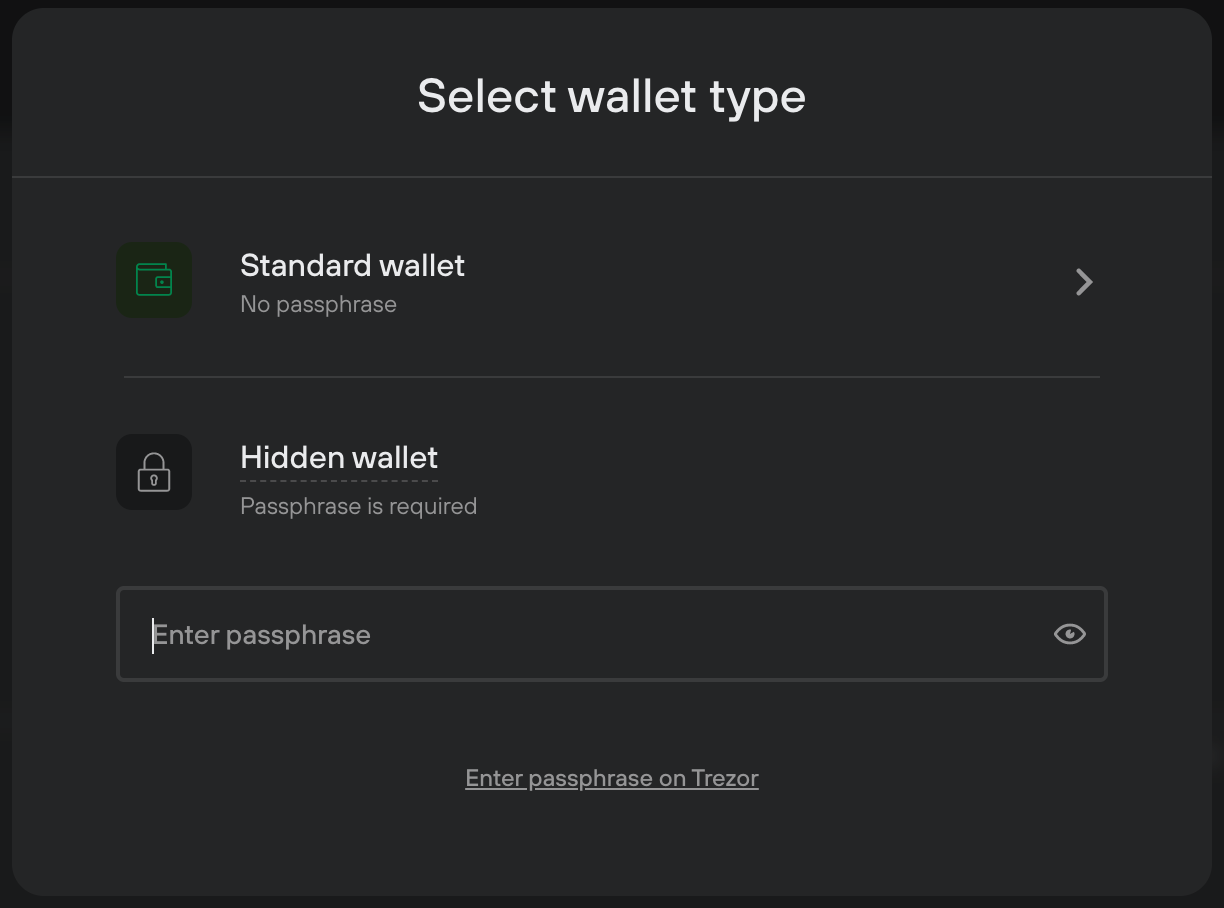
A standard wallet will automatically be created, but you can create multiple hidden wallets to enhance your privacy and security.
To create a hidden wallet, use the passphrase feature, which adds another layer of protection to your assets:
- Your PIN + recovery seed will give you access to your standard wallet
- Your PIN + recovery seed + passphrase will give access to your hidden wallet
Your passphrase can be a word, phrase, or sentence up to 50 characters long.
Note that it is case sensitive, so a passphrase like “pAsSpHrAsE” will give you access to one hidden wallet, while “PASSphrase” will give you access to another hidden wallet.
Recovering your assets
If your device gets lost or damaged, or if you have an existing wallet that you'd like to recover on your Trezor, you can always use the “Recover wallet” option to access your coins.
After you've installed the firmware on your new Trezor hardware wallet, simply select the “Recover wallet” option instead of “Create new wallet”.
Enter your recovery seed phrase using your device, and you'll be able to access the contents of your wallet.
Note that if you lose your seed phrase, even Trezor will not be able to help you recover your assets.
Hardware wallets conclusion
Hardware wallets are the perfect combination of security and convenience, and the Trezor hardware wallet is one of several secure and reliable options for storing cryptocurrencies.
Its easy-to-use interface, streamlined setup process, and versatile features make it an excellent choice for anyone looking to store their crypto assets securely.
Buy crypto on Trezor with MoonPay
Trezor helps you go beyond just storing cryptocurrency. You can use Trezor Suite to buy crypto with your credit or debit card.
MoonPay makes it easy to buy Bitcoin and other major cryptocurrencies directly from your Trezor wallet in a matter of minutes.
With no extra registration required, you can start buying crypto directly from your Trezor using local currency.

.png?w=3840&q=90)