MetaMask is the most popular non-custodial crypto wallet, with functionality to connect with thousands of decentralized applications (dApps).
Initially, the wallet could only interact with Ethereum-based applications and crypto tokens. But over time, MetaMask developers have made the wallet compatible with a range of Ethereum Virtual Machine (EVM)-compatible blockchains, one of them being Binance Smart Chain (BSC).
Compared to the early days of the wallet, it's far simpler today to connect MetaMask to BSC. Previously, users had to manually add the Network name, RPC URL, Smart Chain (ChainID), block explorer URL, and currency symbol.
Today, MetaMask automatically allows users to select BSC and connect to Binance Smart Chain, saving time and skipping the steps of needing to manually enter all the network parameters.
This article shares a simple step-by-step guide to add Binance Smart Chain (BSC) to a MetaMask wallet.
Note: Binance Smart Chain (BSC) is now also known as BNB Chain or BNB Smart Chain.
Step-by-step process to connect Metamask to Binance Smart Chain (BSC)
If you're wondering how to connect Metamask to Binance Smart Chain (BSC), just follow these steps:
Step 1: Install MetaMask
To add Binance Smart Chain to MetaMask, first you'll need to have MetaMask installed on your device.
Depending on the browser you use, you can install the MetaMask extension for Google Chrome, Firefox, Microsoft Edge, Opera, and Brave (Chrome Web Store).
In addition to the browser extension, MetaMask’s Android and iOS applications also offer a seamless crypto wallet user experience for buying, storing, and sending crypto assets.
When setting up the MetaMask wallet, users should carefully store their Secret Recovery Phrase in a safe place offline to prevent any misuse or hack of their digital assets.
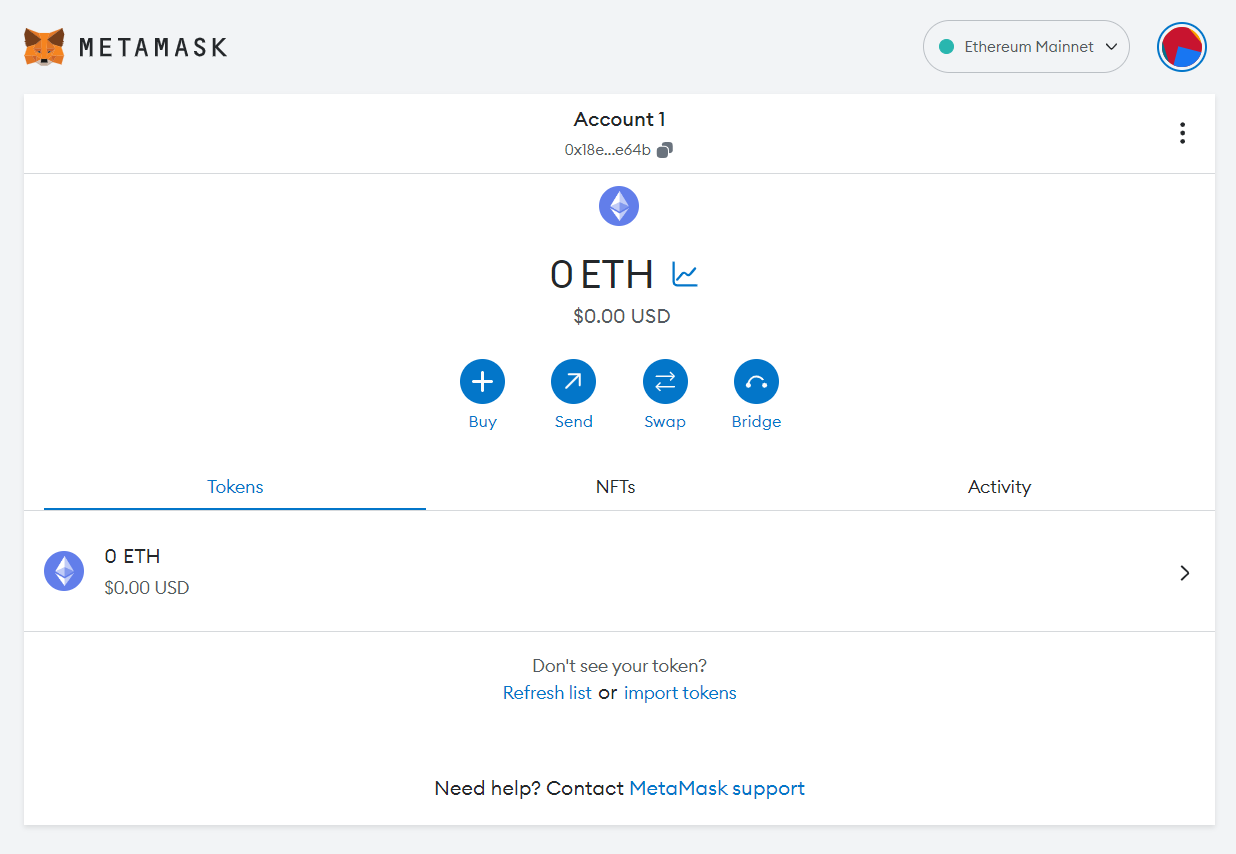
Once the installation and setup are complete, open MetaMask from your web browser or phone. You’ll see the wallet screen appear in the image below.
Note: This article uses images from the MetaMask Google Chrome extension to demonstrate the steps.
Step 2: Click 'Add network'
By default, MetaMask is connected to the Ethereum mainnet network. You can see the network name in the upper right corner of the wallet screen.
Click ‘Ethereum Mainnet’ to show the list of networks your wallet is already connected to.
As you can see in the image below, this wallet is only connected to Ethereum.
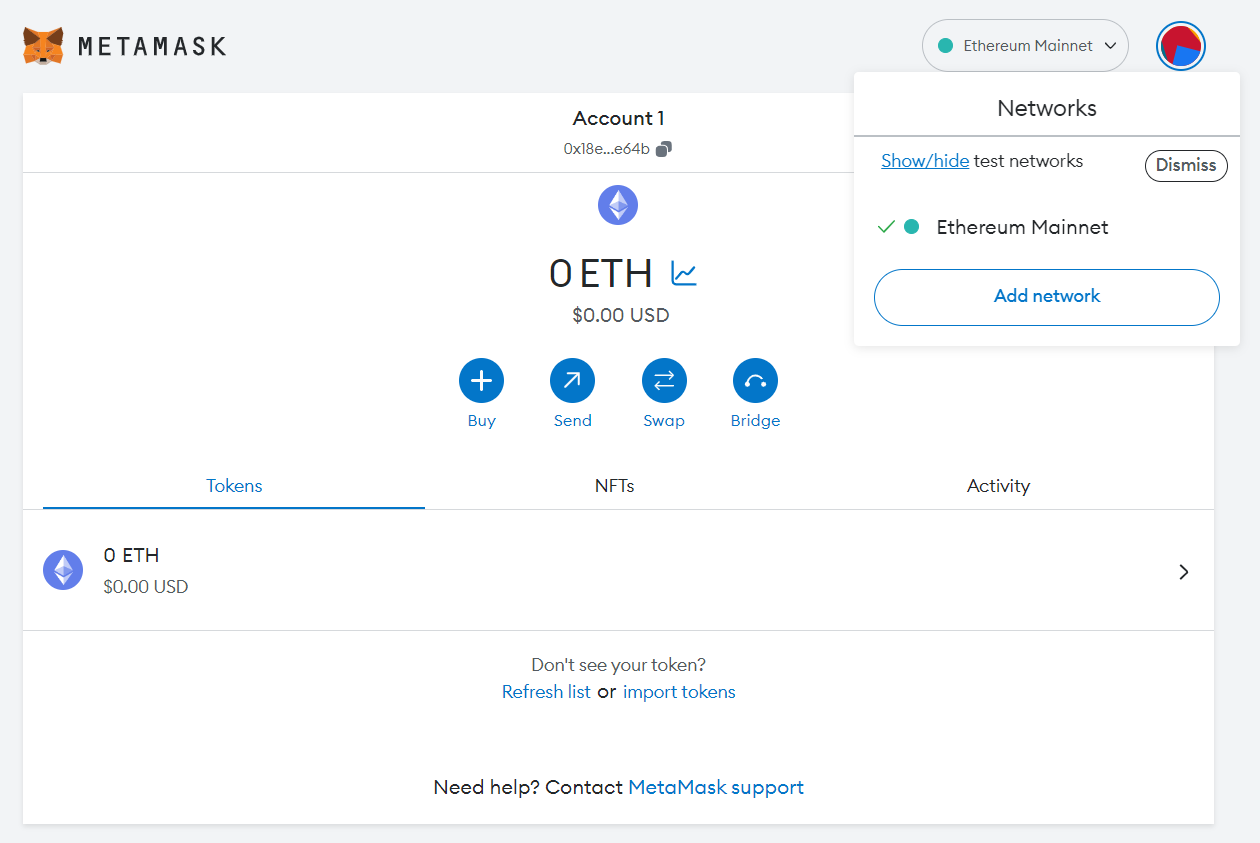
To add Binance Smart Chain to MetaMask, simply click ‘Add network’.
Step 3: Select Binance Smart Chain from the dropdown menu
The previous step will take you to a network settings page with a list of popular networks supported by MetaMask. You can select BNB Smart Chain from the list.
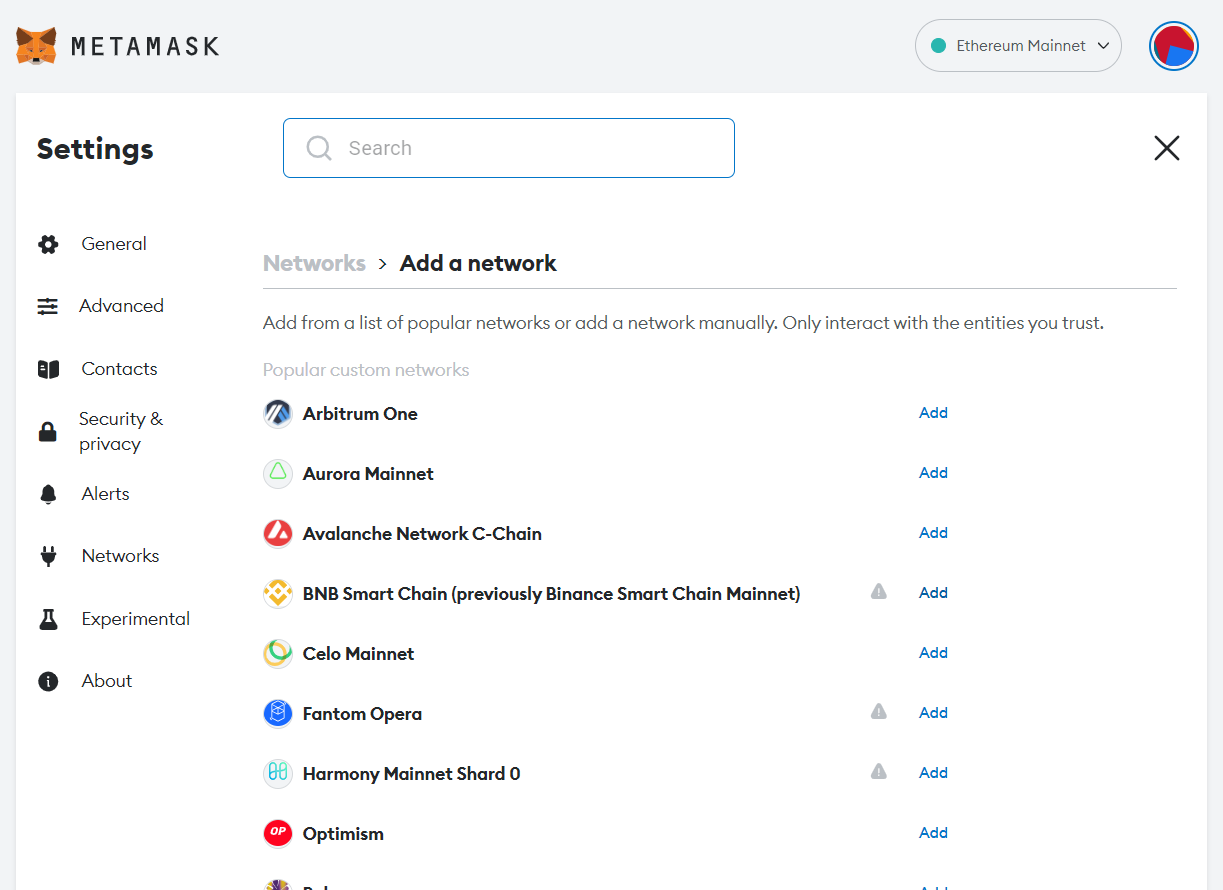
Just click the ‘Add’ button beside the BNB Smart Chain Mainnet option to add the network.
Step 4: Click ‘Approve’ to add Binance Smart Chain to MetaMask
Once you click ‘Add’, your MetaMask wallet will display a message box saying, ‘Want to add this network?’
This will display the network name, network URL, Chain ID, currency symbol, and the BNB block explorer URL. These details ensure that users don’t add the wrong network to MetaMask by mistake.
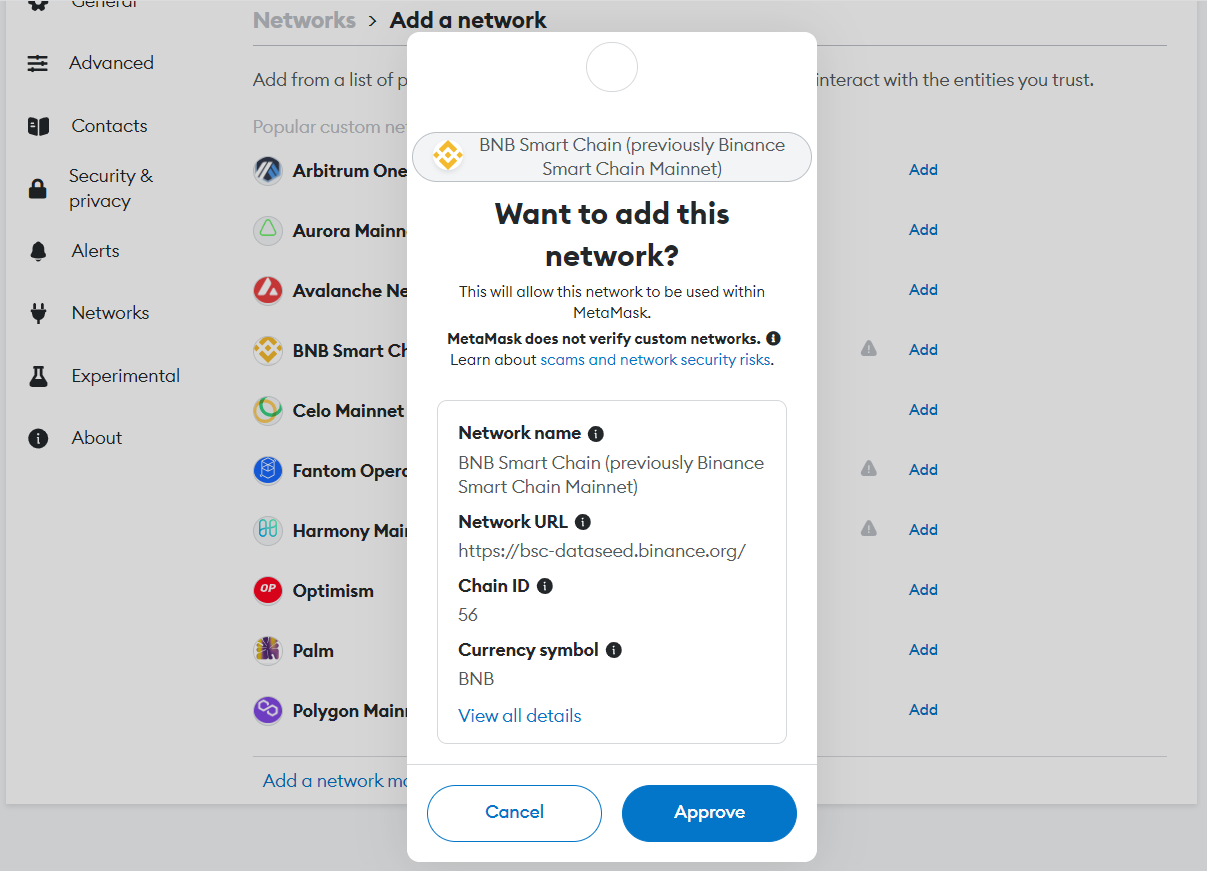
Once you’ve verified the details, click ‘Approve’ to add Binance Smart Chain to MetaMask.
Step 5: Select the ‘Switch to BNB Smart Chain’ option
Once you click the ‘Approve’ button, MetaMask will add BNB Smart Chain to your wallet.
It displays a box with the message ‘Network added successfully’. A similar message is visible in the bottom right corner of the screen.
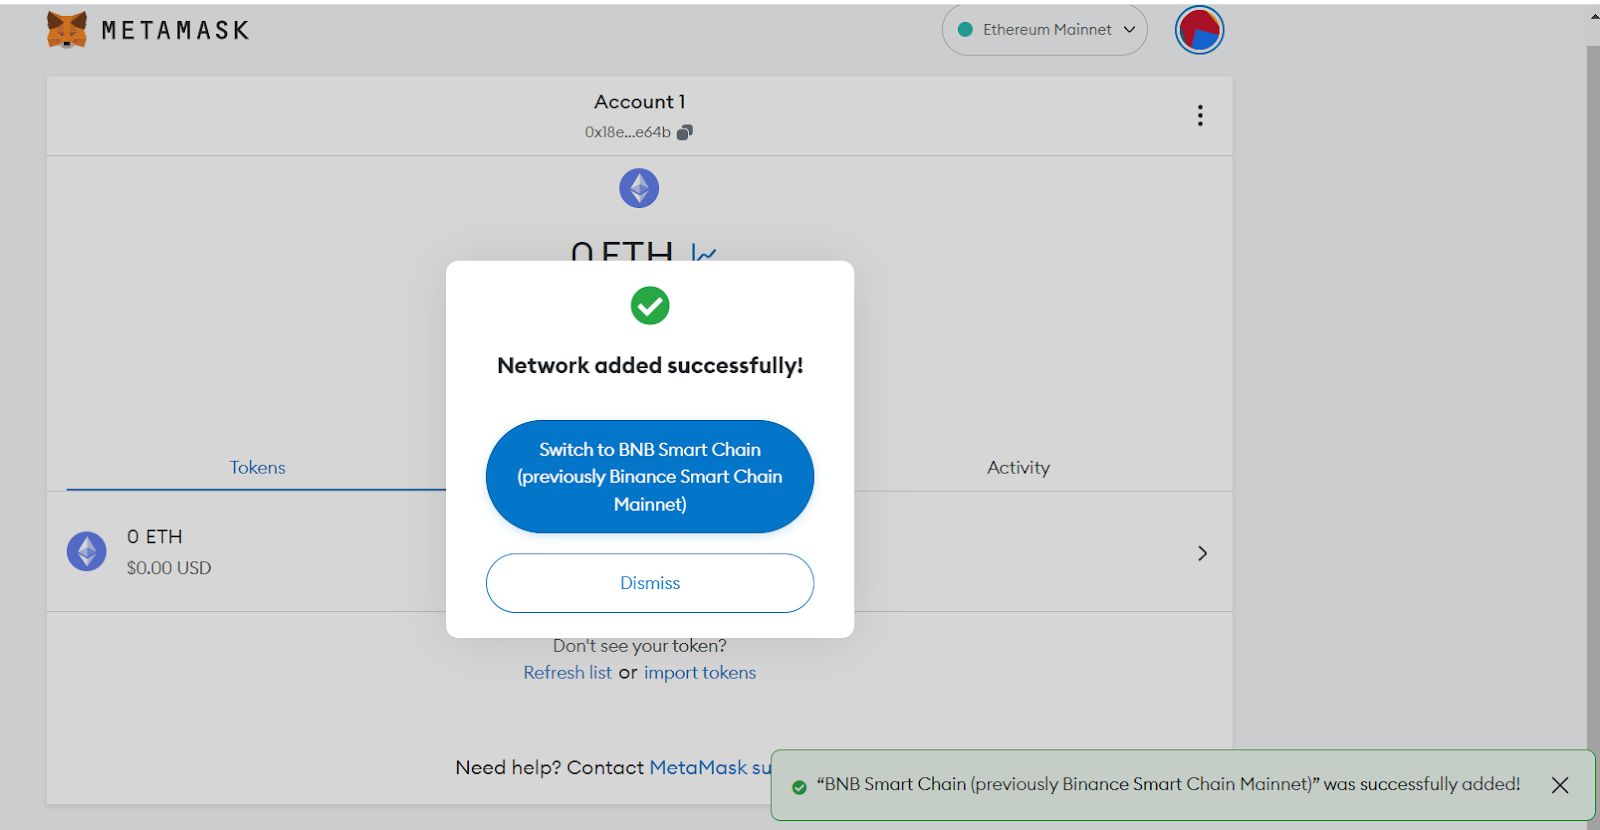
But connecting MetaMask to BNB Smart Chain is not yet complete. To do so, click the ‘Switch to BNB Smart Chain’ box that appears in the next pop-up.
Step 6: Click ‘Got It’ to complete the connection
MetaMask will now display a success message to confirm the network switch. But there are still some necessary conditions to use Binance Smart Chain on MetaMask.
For example, users will need to use a bridge to send digital assets from one network to the other. Additionally, users may need to manually add BNB tokens to the wallet address.
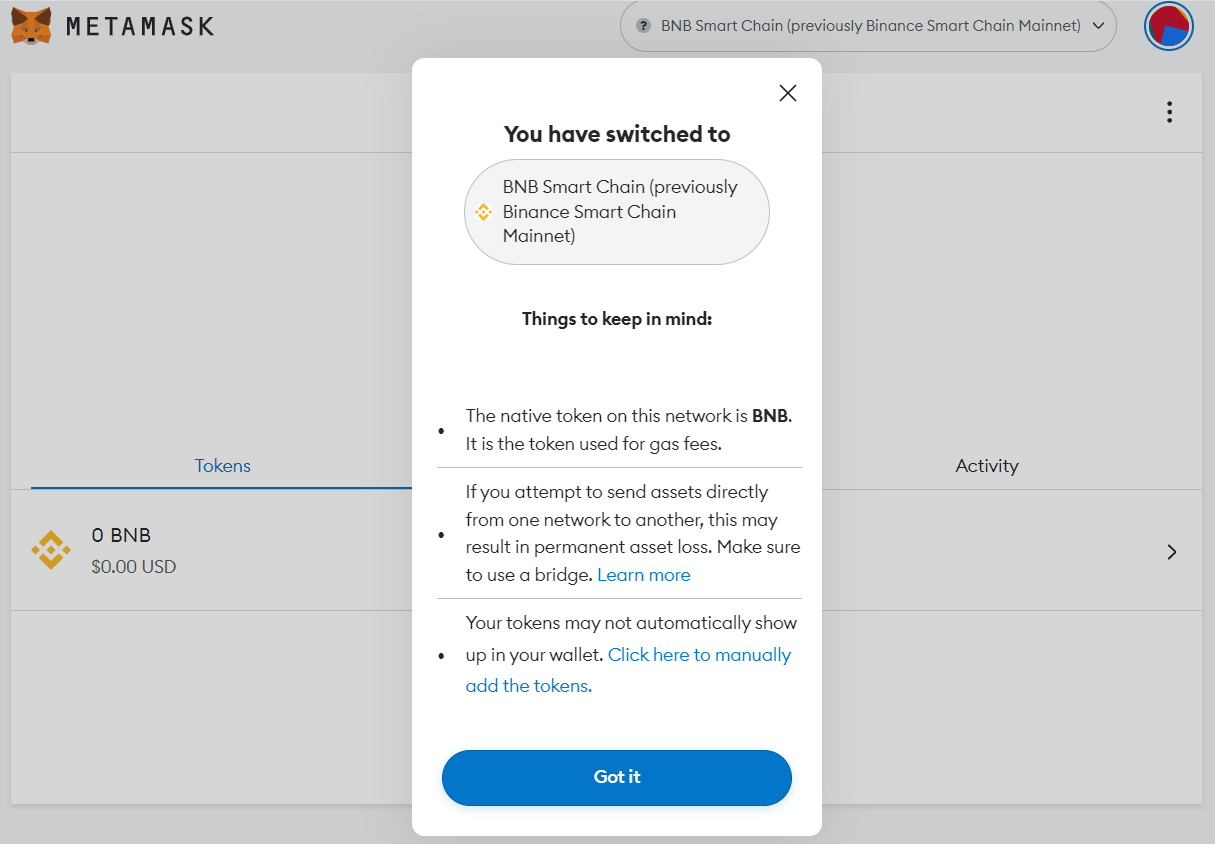
After reviewing these conditions, click ‘Got It’ to complete the connection process.
Step 7: Start using the Binance Smart Chain on MetaMask
Congratulations! The wallet configuration is now complete.
The existing wallet contact address now shows the BNB icon and the BNB balance.
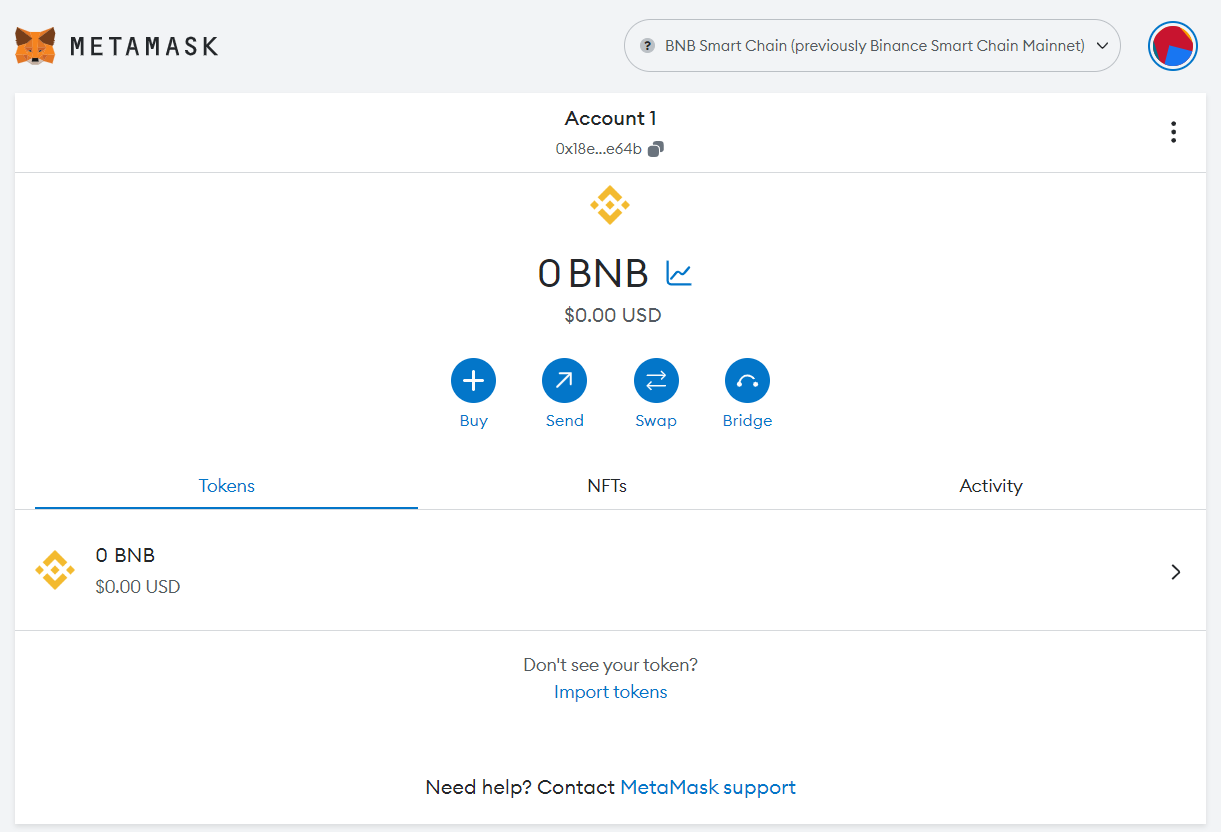
You can now start using the BSC network on MetaMask!
Did you know? You can also connect MetaMask to Polygon directly in your wallet.
What to do after connecting MetaMask to BNB Smart Chain
Once you have connected your MetaMask wallet to Binance Smart Chain, you can explore the entire BSC network ecosystem, including dApps, tokens, NFTs, DAOs, and more.
Here are a few things you can do on the BSC network:
Swap tokens
You can execute a token swap on BSC by going to a decentralized exchange (DEX) and swapping BNB tokens with other cryptocurrencies on the network.
Use dApps
Binance has a vast dApp ecosystem that includes NFT marketplaces, decentralized finance (DeFi) protocols, and gaming platforms. BNB holders that add BSC to MetaMask can use their wallet to interact with any of these apps and protocols on the BSC network.
Pay transaction fees
Whenever you make a transaction on the BSC network, you'll need to pay for transaction costs (gas fees) in the form of BNB. This is true of any blockchain network, not just Binance.
It's generally good practice to keep any wallet funded with tokens to seamlessly execute transactions on the corresponding blockchain, without needing to deposit additional funds.
Note: When sending BNB (or any cryptocurrency), you should always be careful not to send assets to an unsupported network. Doing so could lead to permanent loss of funds.
Start using BNB Smart Chain with MoonPay
Now that you know how to connect Metamask to Binance Smart Chain (BSC), it's time to start exploring the BSC blockchain for yourself.
You can buy BNB via MoonPay or through any of our partner wallet applications with a credit card, bank transfer, Apple Pay, Google Pay, and many other payment methods. Just enter the amount of BNB you wish to purchase and follow the steps to complete your order.
MoonPay makes it easy to sell BNB when you decide it's time to cash out your crypto. Simply enter the amount of BNB you'd like to sell and enter the details where you want to receive your funds.
Note: Due to recent regulations, Binance Coin (BNB) is not currently supported in the US.